There is a distinct difference between “hot cocoa” and “hot chocolate,” though we often use the terms interchangeably. Hot cocoa is typically the stuff of childhood: a tear-open packet of powder, hot water, and a few dehydrated marshmallows floating on a thin, sugary liquid. It’s nostalgic, sure, but it rarely satisfies a true chocolate craving.
Then, there is Italian Hot Chocolate (Cioccolata Calda).
This isn’t just a drink; it is an experience. It is viscous, glossy, and intensely chocolatey, straddling the line between a beverage and a dessert. Imagine drinking a melted high-end truffle or a pourable chocolate pudding. That is what we are making today.
If you have been searching for that coffee-shop style richness at home, put down the instant mix. With just a few pantry staples and ten minutes, you can create a mug of luxury that puts every other version to shame.
Why This Recipe Is Superior
Most homemade recipes miss the mark because they lack body. They taste like chocolate-flavored milk rather than drinking chocolate. This recipe solves that problem using three specific techniques:
- The Double-Chocolate Punch: We don’t choose between cocoa powder and bar chocolate; we use both. The cocoa powder provides the deep, earthy base notes, while the real chopped chocolate provides the luxurious mouthfeel and cocoa butter richness.
- The Secret Thickener: Instead of standard granulated sugar, we use confectioners’ sugar (powdered sugar). Confectioners’ sugar contains a small amount of cornstarch (anti-caking agent), which acts as a subtle thickener, giving the milk a velvety texture without needing to make a separate slurry.
- The Simmer: We don’t just heat the milk; we gently simmer the mixture. This activates the starches and emulsifies the melted chocolate, preventing that oily separation you sometimes see in homemade versions.
Ingredients: The Quality Matters
Because this recipe relies on so few ingredients, there is nowhere for poor quality to hide. Let’s break down what you need for the perfect cup.
1. The Chocolate (Crucial!)
This is the star of the show. You want a high-quality semi-sweet or bittersweet chocolate bar.
- Aim for 60% to 70% Cacao: This strikes the perfect balance. It’s dark enough to have a complex flavor profile but sweet enough to be comforting.
- Avoid Chocolate Chips: Standard chocolate chips contain stabilizers (like soy lecithin) that help them hold their shape in cookies. In a drink, these stabilizers can prevent the chocolate from melting into a perfectly smooth emulsion. Buy a bar and chop it yourself—it makes a difference.
2. The Cocoa Powder
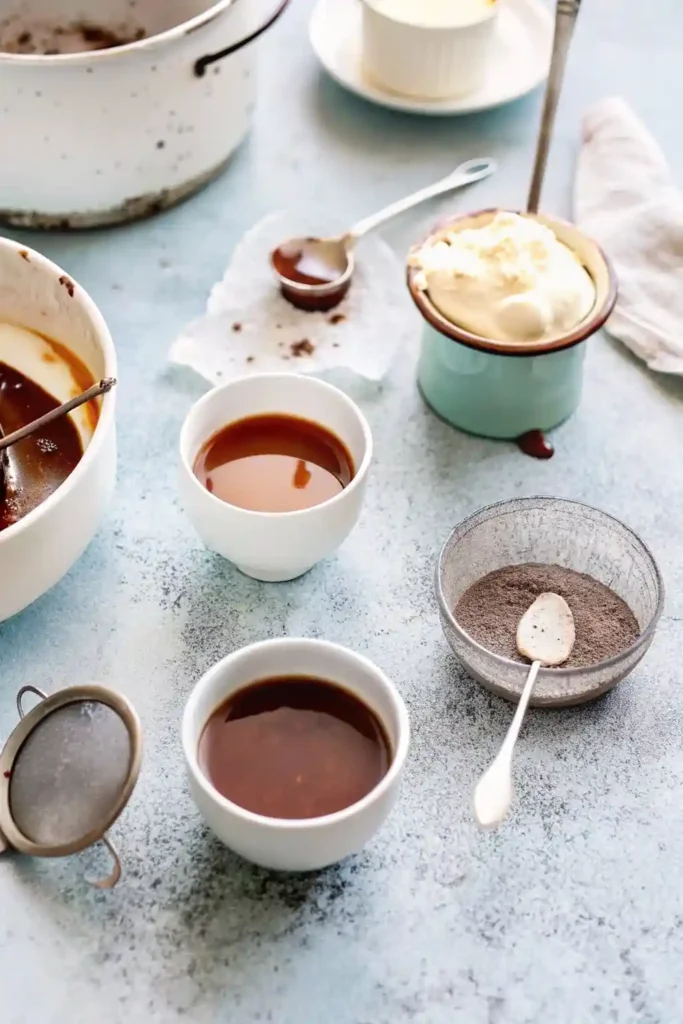
Use Unsweetened Cocoa Powder. Dutch-process cocoa is preferred here because it has been alkalized, meaning its acidity has been neutralized. This results in a darker color and a smoother, mellower flavor that pairs beautifully with the milk.
3. The Milk
Whole milk is non-negotiable for the “best” version. The fat content is necessary to carry the flavor and provide creaminess.
- Can you use dairy-free? Yes! Oat milk is the best substitute because it is naturally creamy and thick. Almond milk tends to be too thin for this specific style of drink.
4. Confectioners’ Sugar
As mentioned, this is our sweetener and thickener in one. It dissolves instantly, eliminating the risk of a grainy texture that granulated sugar can sometimes leave behind if not fully dissolved.
5. Flaky Sea Salt
Salt is a flavor potentiator. It suppresses bitterness and enhances sweetness. A generous pinch of flaky sea salt (like Maldon) wakes up the chocolate flavor and makes it pop.
Step-by-Step Instructions
Step 1: The Sift (Don’t Skip This!)
Cocoa powder and confectioners’ sugar are notorious for clumping. Place a fine-mesh sieve over a small bowl and sift the cocoa and sugar together. Add the salt and whisk.
- Why? If you dump clumped cocoa into hot milk, you will spend the next 15 minutes chasing dry pockets of powder with your whisk. Sifting ensures a silky smooth start.
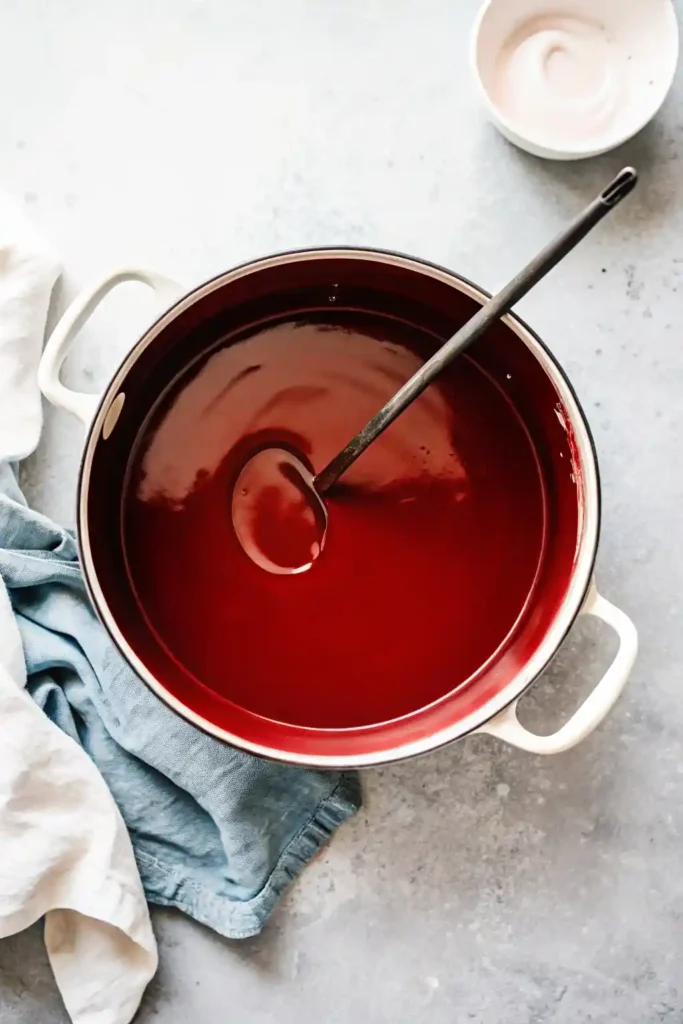
Step 2: The Simmer
Pour your milk into a medium saucepan (approx. 4-quart) and place it over medium heat. You want to bring it to a gentle simmer—look for small bubbles forming around the edges. Do not let it come to a rolling boil, as scalded milk can taste burnt.
Step 3: The Emulsion
Reduce the heat to low. Add your vanilla extract, the sifted cocoa/sugar mixture, and your chopped chocolate pieces.
- Technique: Switch to a whisk. Whisk constantly but gently. You aren’t trying to whip air into it (like a meringue); you are encouraging the solids to melt and emulsify into the liquid.
Step 4: The Thicken
Continue whisking over low heat for about 2-3 minutes. You will feel the resistance change as the chocolate melts and the starch in the sugar hydrates. The mixture will transform from “milk with stuff in it” to a glossy, unified liquid.
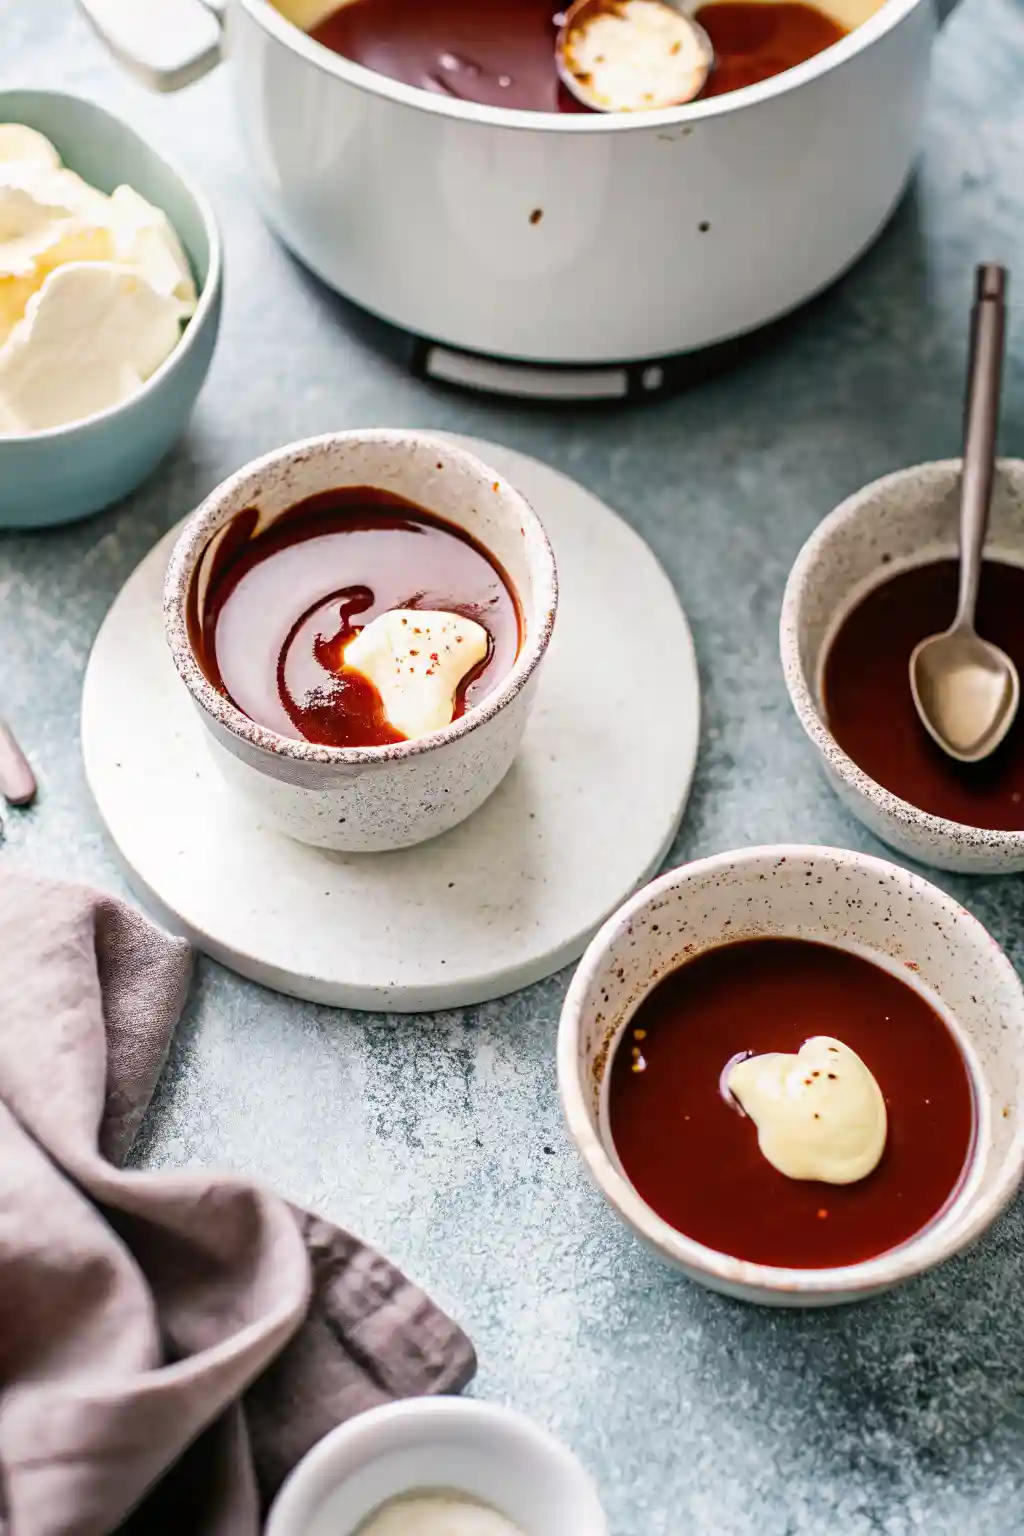
Step 5: Serve Immediately
This drink is very rich, so small portions are best. Pour into mugs and top immediately while piping hot.
Creative Variations
Once you have mastered the base, you can customize your cup to fit the mood.
- The Aztec/Mexican Twist: Add ½ teaspoon of ground cinnamon and a tiny pinch of cayenne pepper or chili powder. The heat hits the back of your throat and warms you up instantly.
- The Peppermint Patty: Add ¼ teaspoon of peppermint extract. Garnish with crushed candy canes for a festive holiday look.
- The Grown-Up Version: Add a 1-ounce shot of Baileys Irish Cream, Kahlúa, or Bourbon.
- Mocha Style: Dissolve 1 teaspoon of instant espresso powder into the milk while heating to intensify the chocolate flavor without making it taste like coffee.
Troubleshooting Your Hot Chocolate
It’s too thick. You effectively made a ganache! Just splash in a little more milk, 1 tablespoon at a time, whisking until it reaches your desired consistency.
It’s grainy. This usually means the chocolate seized or the dry ingredients weren’t sifted. Unfortunately, you can’t really “fix” seized chocolate, but you can try pouring the mixture through a fine-mesh sieve into your mug to catch the lumps.
It separated/looks oily. The heat was likely too high. Chocolate is temperamental. If you boil it aggressively, the cocoa butter separates from the solids. Keep the heat low and slow. You can try to rescue it by adding a splash of cold milk and whisking vigorously off the heat.
Storage and Reheating
If you somehow have leftovers (unlikely!), this hot chocolate stores surprisingly well.
- Refrigerator: Store in an airtight jar for up to 4 days. It will solidify into a pudding-like consistency when cold.
- Reheating: Spoon the mixture back into a saucepan. Reheat on low, whisking constantly. You may need to add a splash of milk to loosen it up again. Do not microwave, as it tends to heat unevenly and can cause the chocolate to separate.
Conclusion
This Italian Hot Chocolate is more than just a warm drink; it is a ritual. It forces you to slow down, sip slowly, and savor the complexity of the chocolate. Whether you serve it with a mountain of homemade whipped cream or simply on its own, it is the ultimate remedy for a cold winter day.
The Best Italian Hot Chocolate
Ingredients
Equipment
Method
- Pour the milk into a medium saucepan and place over medium heat. Bring to a gentle simmer — small bubbles should appear around the edges. Do not let it come to a rolling boil.
- While the milk heats, sift the confectioners’ sugar and cocoa powder together into a small bowl. Whisk in the flaky sea salt.
- Reduce heat to low. Add the vanilla, the sifted cocoa–sugar mixture, and the chopped chocolate to the warm milk.
- Whisk continuously and gently for 2–3 minutes over low heat until the chocolate is fully melted and the mixture becomes glossy and slightly thickened.
- Adjust thickness if desired by adding a splash more warm milk. Pour into mugs immediately; top with whipped cream or marshmallows if using.


