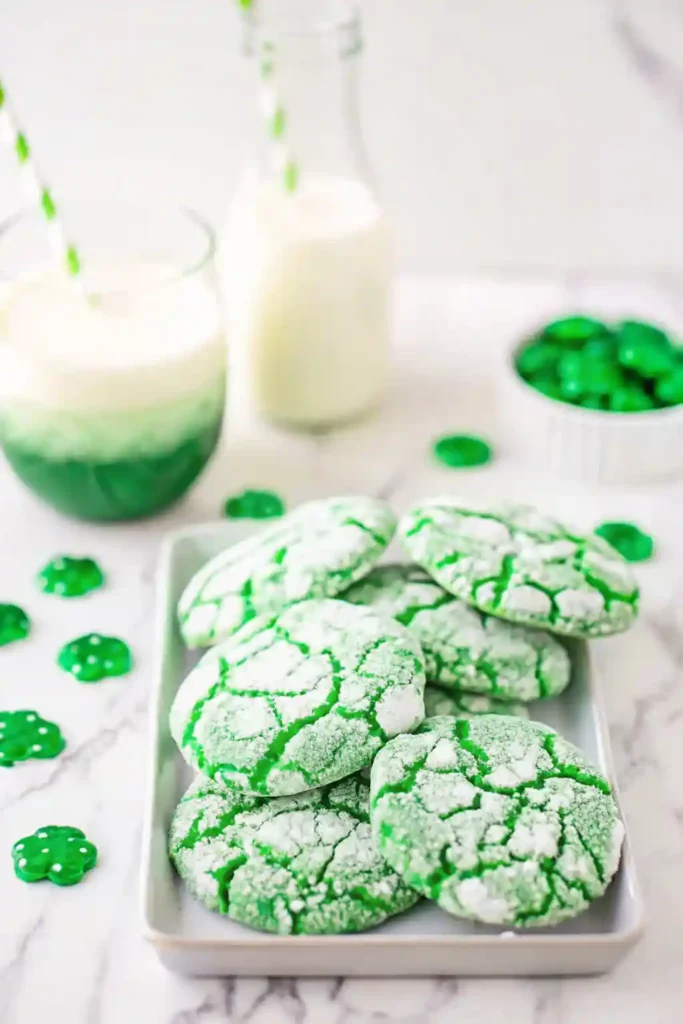
When the month of March arrives, the pressure to produce festive, holiday-themed treats can feel overwhelming, especially for those who don’t consider themselves “master bakers.” However, the most successful holiday gatherings often rely on clever shortcuts that deliver high-impact results with minimal effort. These Easy St. Patrick’s Day Cookies are the ultimate solution: a vibrant, emerald-green crinkle cookie made using a simple box of white cake mix.
The beauty of this recipe lies in its efficiency and its foolproof nature. By transforming a standard cake mix into a thick, pliable cookie dough, you bypass the precise measuring of flour, leavening, and sugar, resulting in a treat that is consistently soft, chewy, and visually stunning. The signature “crackle” finish is achieved through a specific double-rolling technique involving both granulated and powdered sugar, ensuring your cookies look like they were plucked from a professional bakery window. Whether you are prepping for a school party, a neighborhood potluck, or looking for a “Kids Snacks” activity, these cookies are a guaranteed holiday win. Let’s explore the science of the cake mix transformation and the secrets to achieving the perfect emerald crinkle.
Why You’ll Love This Recipe
- Effortless 6-Ingredient Preparation: You likely already have every ingredient—eggs, oil, cake mix, and sugar—in your pantry right now.
- The “Zero-Fail” Shortcut: Cake mix is chemically designed for success. Using it as a base ensures your cookies have the perfect rise and a tender crumb every single time.
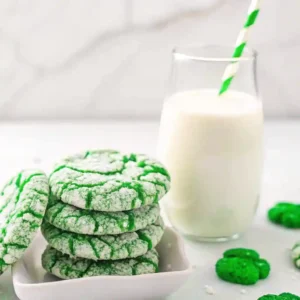
- Vibrant Visual Impact: The deep green color provides a high-contrast aesthetic that is perfect for St. Patrick’s Day, “Grinch” themes, or spring celebrations.
- Superior Softness: Unlike traditional butter cookies that can become hard, cake mix cookies maintain a soft, brownie-like texture for days.
- Kid-Friendly Kitchen Project: The process of rolling the dough into “snowballs” and seeing the cracks form in the oven is a magical experience for young children.
Ingredient Notes & Pro Selections
Because this is a minimalist recipe, the quality of your coloring agent and the state of your cake mix will define the final “Gourmet” look.
The Cake Mix Base
- White Cake Mix (15.25 oz): A standard box mix (like Betty Crocker or Duncan Hines) is ideal. Using a white mix ensures the green dye remains vibrant and “true” to color.
- Substitution: You can use a yellow cake mix if necessary, but keep in mind the yellow undertones will “warm” the green dye, resulting in a more lime-colored or olive-green cookie.
The Dye Factor
- Gel Food Coloring (Highly Recommended): For a true “Kelly Green” or emerald hue, you must use gel coloring (like AmeriColor or Wilton). Liquid food coloring is mostly water; adding enough to get a deep green will thin out the dough, causing the cookies to spread too much in the oven.
The Texture Binders
- Large Eggs: Use room-temperature eggs for the best emulsification.
- Vegetable Oil: This provides the necessary fat and moisture. Canola or avocado oil are also excellent neutral-flavored substitutes.
The “Crinkle” Duo
- Granulated Sugar & Powdered Sugar: This is a two-step process. Rolling in granulated sugar first creates a barrier that prevents the powdered sugar from absorbing into the dough, ensuring your “white cracks” remain bright and opaque after baking.
Step-by-Step Instructions
Step 1: Mix the Wet and Dry Base
In a large mixing bowl, combine the white cake mix, vegetable oil, and two large eggs. Use a sturdy spatula or a wooden spoon to stir the ingredients until a thick, sticky dough forms. Ensure there are no large pockets of dry cake mix remaining at the bottom of the bowl.
Step 2: Achieve the Emerald Tint
Stir in the green gel food coloring. Start with a small amount (about 1/4 teaspoon) and mix thoroughly. Continue adding gel one drop at a time until the dough reaches a vibrant, uniform green.
- Pro Tip: The color will intensify slightly as the dough rests, so aim for a shade that looks like a bright shamrock.
Step 3: The Mandatory Chill
Cover the bowl tightly with plastic wrap and place it in the refrigerator for at least 30 minutes.
- Why Chill? Cake mix dough is notoriously sticky. Chilling solidifies the fats and hydrates the starches, making it possible to roll the dough into balls without it sticking to your hands.
Step 4: Prep the Oven and Sugar Stations
Preheat your oven to 350°F (175°C). Line two large baking sheets with parchment paper or silicone mats. Place the granulated sugar in one small bowl and the powdered sugar in a separate small bowl.
Step 5: The Double-Sugar Roll
Using a 1-tablespoon cookie scoop, portion out a ball of dough. Roll it between your palms to smooth it into a perfect circle. First, roll the ball in the granulated sugar until completely coated. Second, roll the ball in the powdered sugar, ensuring a very thick, heavy coating of white. Place the balls on the prepared baking sheet, spacing them 2 inches apart.
Step 6: Bake and Cool
Bake for 9 to 12 minutes.
- The Doneness Test: The cookies are done when the edges are set and the “cracks” have fully formed. The centers should still look slightly soft—do not wait for them to brown, or the green color will dull. Let the cookies rest on the baking sheet for 5 minutes to firm up before transferring them to a wire rack or paper towel to cool completely.
Secrets to the Perfect Crinkle Crack
- Don’t Skip the Granulated Sugar: As mentioned, this is the most common mistake. If you roll directly into powdered sugar, the moisture in the dough will dissolve the sugar in the oven, and your “crinkles” will disappear. The granulated sugar acts as a protective shield.
- Handle Gently: Once the cookies are rolled in powdered sugar, handle them as little as possible. Touching the surface will smudge the white coating, resulting in a messy rather than a crisp “cracked” look.
- Check Your Oven Temp: If your oven is too cool, the cookies will spread before they set, leading to large, flat pancakes. Ensure your oven is fully preheated to 350°F for that quick “burst” of heat that creates the cracks.
- Consistency is Key: Use a scoop! Uniform dough balls ensure every cookie in the batch finishes baking at the exact same time.
Variations and Substitutions
- Mint Chocolate Crinkle: Add 1/2 teaspoon of peppermint extract to the dough and fold in 1/2 cup of mini chocolate chips for a “Shamrock Shake” flavor profile.
- White Chocolate Surprise: Press a single white chocolate chip into the center of each cookie immediately after removing them from the oven.
- Golden Pot of Gold: Instead of powdered sugar, roll the green dough in gold sanding sugar for a shimmering, “Luck of the Irish” aesthetic.
- Yellow Cake Version: As noted by the competitor, yellow cake mix is a fine substitute, but it will result in a warmer, more chartreuse-green hue.
Storage and Freezing
- Room Temperature: Store these cookies in an airtight container for up to 5 days. To keep them extra soft, place a small piece of white bread in the container to maintain humidity.
- Freezing Dough: You can scoop the dough balls and freeze them on a tray. Once hard, move them to a Ziploc bag for up to 3 months. Bake directly from frozen, adding an extra 2 minutes to the timer.
- Freezing Baked Cookies: These freeze exceptionally well! Wrap them in plastic or layer them with parchment in a freezer-safe container. Thaw on the counter for 30 minutes before eating.
FAQ
Why didn’t my cookies spread? This usually happens if the dough was chilled for too long (over 2 hours) or if the cake mix had too much flour. If they don’t spread, you can gently press the balls down slightly with the bottom of a glass before baking.
Can I make these with a different color? Absolutely. This “cake mix crinkle” method works for any holiday. Use red for Valentine’s Day, orange for Halloween, or blue for winter-themed parties.
Do I have to use oil? You can substitute the vegetable oil with an equal amount of melted unsalted butter for a richer, more “homemade” flavor, though the texture will be slightly denser.
Why is my powdered sugar melting? This happens if the dough is too warm when rolled or if the granulated sugar step was skipped. Ensure your dough is cold and your granulated sugar coat is thorough!
Easy St. Patrick’s Day Cookies (Cake Mix Crinkle Recipe)
Ingredients
Equipment
Method
- In a large bowl, mix together the cake mix, eggs, and vegetable oil until a thick dough forms with no dry pockets.
- Stir in green gel food coloring, starting with a small amount and adding more until the dough reaches a vibrant emerald green.
- Cover the bowl and refrigerate the dough for at least 30 minutes to firm it up for rolling.
- Preheat oven to 350°F (175°C) and line baking sheets with parchment paper. Place granulated sugar and powdered sugar into two separate bowls.
- Scoop 1-tablespoon portions of dough, roll into balls, then roll first in granulated sugar and then heavily in powdered sugar. Place 2 inches apart on baking sheets.
- Bake for 9–12 minutes until edges are set and crinkles form. Centers should remain soft. Cool on the pan for 5 minutes, then transfer to a rack to cool completely.

