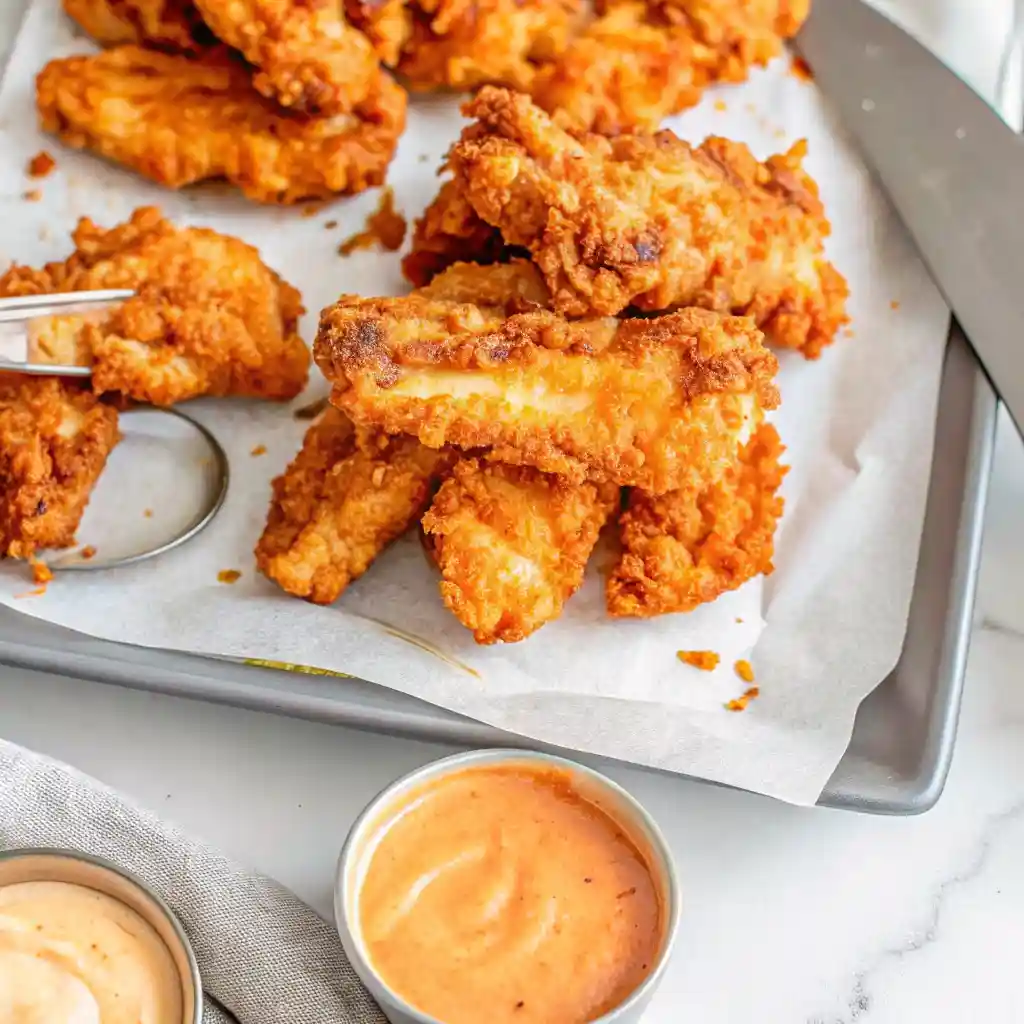
For fans of the cult-classic fast-food chain, Raising Cane’s isn’t just a meal; it’s an obsession. The menu is famously limited, focusing on doing one thing perfectly: tender, craggy, golden-brown chicken strips served with a side of “Texas Toast” and that legendary, peppery dipping sauce. If you have ever found yourself craving a “Caniac Combo” late at night or simply want to avoid the long drive-thru lines, this Homemade Raising Cane’s Chicken Tenders recipe is your ticket to fast-food nirvana in your own kitchen.
The secret to Cane’s success lies in two specific areas: the tenderness of the meat and the unique texture of the breading. This recipe utilizes a long buttermilk brine to break down the proteins in the chicken, followed by a light, flour-based dredging process that creates those iconic “crags” and “nooks” designed to hold onto the sauce. Whether you are hosting a game-day party or feeding a house full of teenagers, these tenders are a guaranteed crowd-pleaser that tastes even better than the restaurant original. Let’s dive into the science of the brine and the specific spice ratios for the perfect copycat sauce.
Why You’ll Love This Recipe
- The Perfect Texture: By using a specific brining and dredging technique, you achieve a coating that is crispy and light, rather than heavy or bready.
- The “Secret” Sauce at Home: You can finally have as much Cane’s Sauce as you want without paying for extra ramekins.
- Budget-Friendly: Feeding a family at Cane’s can be expensive. Making a “Caniac-sized” batch at home costs a fraction of the price.
- High-Quality Ingredients: You control the oil quality and the freshness of the chicken, resulting in a cleaner flavor with no mystery additives.
- Make-Ahead Potential: The sauce actually requires resting time to develop its flavor, making it a perfect prep-ahead component.
Ingredient Notes & Pro Selections
Because the Raising Cane’s menu is so simple, every ingredient has to work overtime to provide flavor. Here is what you need to get that authentic “One Love” taste.
The Chicken & Brine
- Chicken Tenderloins (1.5 – 2 lbs): Always use actual tenderloins rather than sliced chicken breasts. The “tender” is a specific muscle that is naturally more delicate and juicy.
- Buttermilk: The acidity in buttermilk tenderizes the chicken without making it rubbery.
- Large Egg: Whisked into the buttermilk, the egg acts as a binder that helps the flour adhere to the meat in thick, crispy layers.
The Breading
- All-Purpose Flour: The base of the dredge.
- Garlic Powder & Onion Powder: These provide the savory foundation of the breading.
- Creole Seasoning (Tony Chachere’s): This is a key “hidden” flavor in many copycat versions. It adds a subtle back-note of spice and salt.
- Fine Sea Salt & Black Pepper: Cane’s chicken is actually quite seasoned; don’t be afraid of the pepper in the flour mix!
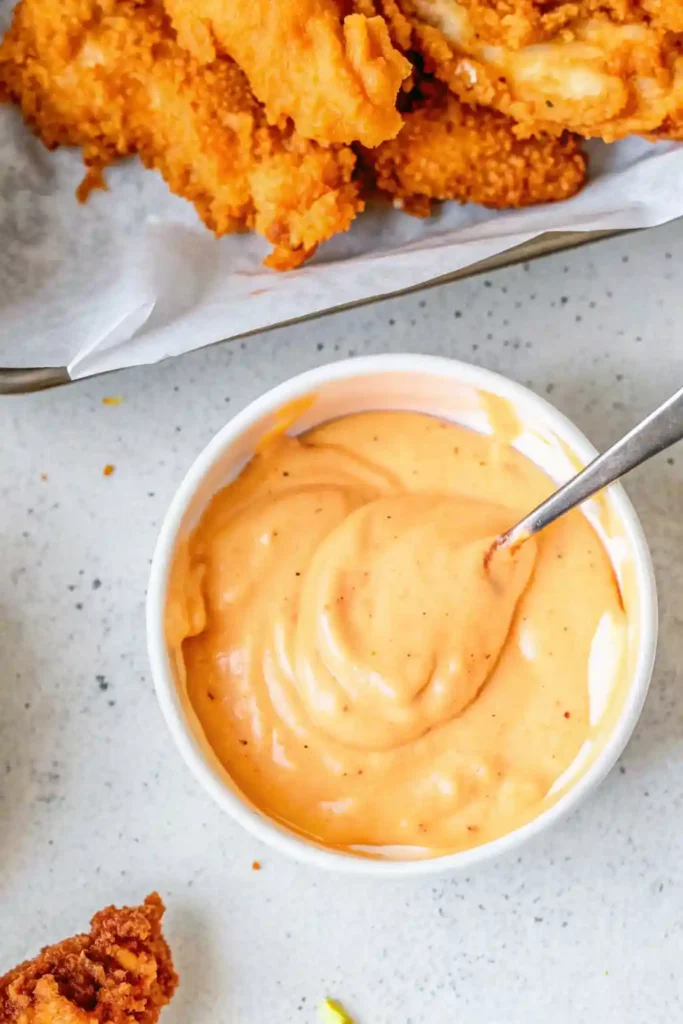
The Legendary Sauce
- Mayonnaise (1 cup): Use a high-quality, full-fat mayo (like Hellmann’s or Duke’s). This is the creamy base.
- Ketchup (1/2 cup): Provides the sweetness and the signature pinkish hue.
- Worcestershire Sauce (1 Tbsp): Adds umami and depth.
- Garlic Powder (1 tsp): Adds a savory punch.
- Coarse Black Pepper (1 tsp): This is the most important part of the sauce. It should be visibly speckled and provide a pleasant “bite.”
Step-by-Step Instructions
Step 1: The Buttermilk Brine
In a large bowl or a gallon-sized Ziploc bag, whisk together the buttermilk and the egg. Add the chicken tenderloins, ensuring they are completely submerged.
- The Timer: Cover and refrigerate for at least 2 hours, but preferably 4 to 6 hours. This is the non-negotiable step for achieving that “fall-apart” tenderness.
Step 2: Prep the “Secret” Sauce
In a medium bowl, whisk together the mayonnaise, ketchup, Worcestershire sauce, garlic powder, and black pepper.
- The “Meld” Rule: Cover the sauce and refrigerate it for at least 2 hours before serving. If you eat it immediately, it will taste like “ketchup-mayo.” After two hours, the pepper and Worcestershire infuse the creaminess, creating that unmistakable Cane’s flavor.
Step 3: The Dredging Station
In a shallow dish, whisk together the flour, Creole seasoning, garlic powder, and extra salt and pepper.
Remove a tender from the buttermilk brine, letting the excess drip off. Drop it into the flour mixture and use your other hand to bury it in flour. Press down firmly. This “pressing” action is what creates the craggy bits of dough that turn into crispy gold in the oil.
Step 4: The Fry
Heat 2 inches of neutral oil (canola, vegetable, or peanut) in a heavy-bottomed skillet or Dutch oven to 350°F (175°C).
Fry the chicken in batches for 3–4 minutes per side.
- Visual Cue: The tenders should be a deep golden brown and reach an internal temperature of 165°F.
Step 5: Drain and Rest
Place the fried tenders on a wire cooling rack set over a baking sheet.
- Pro Tip: Never drain fried chicken on paper towels. The steam trapped between the chicken and the towel will turn the bottom of your tenders soggy. A wire rack allows air to circulate, keeping the coating shatteringly crisp.
Secrets to the Perfect Cane’s Crunch
- Don’t Overcrowd the Pan: Adding too much cold chicken at once will cause the oil temperature to plummet. This leads to greasy, oil-soaked breading rather than a crisp sear.
- The “Double Dip” (Optional): If you want an extra-thick crust, dip the chicken in the flour, then back into the buttermilk, then into the flour a second time. This creates a “heavy duty” breading.
- Temperature Control: Use a kitchen thermometer to monitor your oil. If it gets too hot (above 375°F), the outside will burn before the inside is cooked. If it’s too cool (below 325°F), the chicken will be oily.
- The Texas Toast Pair: To complete the meal, butter both sides of a thick slice of brioche or Texas toast and sprinkle with garlic salt. Grill in a skillet until golden brown.
Variations and Substitutions
- Spicy Version: Add 1 tablespoon of hot sauce to the buttermilk brine and a teaspoon of cayenne pepper to the flour dredge.
- Air Fryer Method: Spritz the breaded tenders generously with oil spray. Air fry at 400°F for 10–12 minutes, flipping halfway through. Note: The texture will be different from deep-frying but still delicious.
- Gluten-Free: Use a 1:1 gluten-free flour blend. Since the buttermilk and egg provide the “glue,” GF flour performs exceptionally well in this recipe.
- The “Naked” Tender: If you want a lower-carb version, skip the breading entirely. Season the tenders and pan-sear them in a little butter. They still taste amazing dipped in the sauce!

Storage and Reheating
- Refrigerator: Store leftovers in an airtight container for up to 3 days.
- Freezing: You can freeze the fried tenders for up to 2 months. Freeze them in a single layer on a tray before moving them to a bag to prevent sticking.
- Reheating: The Air Fryer is the best tool for reheating. Heat at 375°F for 3–5 minutes until the crust re-crisps. Avoid the microwave, as it will make the breading soft and chewy.
- Sauce Storage: The sauce stays fresh in the fridge for up to 1 week. Do not freeze the sauce, as the mayonnaise will separate.
FAQ
Can I use chicken breasts?
Yes, but you should slice them into 1-inch thick strips and be extra diligent with the 4-hour buttermilk brine. Breasts are naturally tougher than tenderloins.
Why does the sauce need to sit?
Raising Cane’s employees often let the sauce sit for 24 hours before serving. This allows the dried spices to rehydrate and the acidity of the ketchup and Worcestershire to mellow out.
What is the best oil for frying chicken?
Peanut oil is the gold standard for flavor and high smoke point, but canola or vegetable oil are excellent budget-friendly alternatives.
Is Raising Cane’s sauce just Thousand Island?
No! Thousand Island contains relish and sugar. Cane’s sauce is savory and pepper-forward, with no pickles or relish involved.

Homemade Raising Cane’s Chicken Tenders & Sauce
Ingredients
Equipment
Method
- Whisk buttermilk and egg together in a large bowl or zip-top bag. Add chicken tenderloins, ensuring they are fully submerged. Cover and refrigerate for at least 2 hours, preferably 4–6 hours.
- In a bowl, whisk mayonnaise, ketchup, Worcestershire sauce, garlic powder, and coarse black pepper until smooth. Cover and refrigerate for at least 2 hours to allow flavors to develop.
- In a shallow dish, whisk flour, garlic powder, onion powder, Creole seasoning, salt, and black pepper.
- Remove chicken from brine, letting excess drip off. Dredge in flour mixture, pressing firmly to create craggy coating.
- Heat 2 inches of oil to 350°F. Fry chicken in batches for 3–4 minutes per side until golden brown and cooked to 165°F.
- Transfer chicken to a wire rack to drain. Serve hot with chilled Cane’s sauce.


