
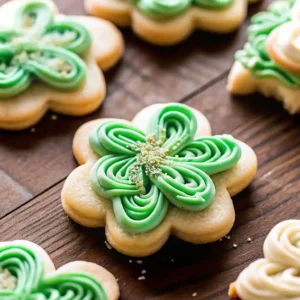
In the world of holiday baking, the sugar cookie is often viewed as a basic staple. However, when executed with professional-grade ingredients and precise technique, it transforms into a gourmet experience. These Vanilla Bean Shamrock Cookies are a masterclass in this elevation. Rather than relying on artificial extracts or heavy frostings, this recipe highlights the complex, floral aroma of real vanilla bean paste and a buttery, tender crumb that holds its intricate shamrock shape with razor-sharp precision.
The secret to a successful cutout cookie lies in the balance of moisture and structure. By utilizing a “no-spread” dough technique and a double-chilling method, we ensure that every leaf of the shamrock remains distinct after baking. These cookies are not just a festive snack; they are a sophisticated dessert perfect for St. Patrick’s Day tea parties, elegant gifting, or a refined holiday dessert board. Let’s explore the science of the vanilla bean infusion and the professional secrets to achieving a perfectly flat, golden-edged finish.
Why You’ll Love This Recipe
- Gourmet Flavor Profile: The use of vanilla bean paste provides thousands of tiny black specks and a deep, multi-dimensional flavor that standard vanilla extract cannot match.
- Flawless Shape Retention: This specific dough formula is engineered to prevent spreading, meaning your shamrock cutters will produce perfect results every time.
- Versatile Decoration: These cookies are stunning when served plain with a sprinkle of sparkling sugar, but they also provide the perfect stable base for royal icing or a simple glaze.
- Exceptional Shelf Life: Thanks to the high butter content and specific leavening ratio, these cookies stay fresh and crisp for over a week, making them ideal for shipping.
- Clean Label Baking: By making these from scratch, you avoid the preservatives and artificial dyes found in store-bought holiday cookies, resulting in a cleaner, superior taste.
Ingredient Notes & Pro Selections
The success of a minimalist cookie depends entirely on the quality of your pantry staples. Here is how to select the best components for a professional-grade result.
The Vanilla Powerhouse
- Vanilla Bean Paste: This is the star of the show. It contains the scraped seeds of the vanilla pod suspended in a thick syrup. It offers a more concentrated flavor than extract and provides the “Gourmet” look of visible vanilla specks.
- Substitution: If you cannot find paste, you can use the seeds from two whole vanilla beans or 1 tablespoon of high-quality pure vanilla extract.
The Butter & Sugar
- Unsalted European Butter: Because the flavor of the butter is so prominent, use a high-fat brand (like Kerrygold). Ensure it is softened but still cool to the touch. If the butter is too warm or oily, the cookies will lose their shape in the oven.
- Granulated Sugar: Provides the necessary sweetness and contributes to the crisp, snap-like texture of the edges.
The Structure Binders
- All-Purpose Flour: Use a high-quality unbleached flour. Be sure to use the “spoon and level” method to avoid over-packing, which leads to dry, tough cookies.
- Cornstarch (The Secret Ingredient): Adding a small amount of cornstarch to the flour helps soften the proteins, resulting in a “tender-crisp” bite and helping the dough remain white and opaque.
- Large Egg: Ensure the egg is at room temperature to allow it to emulsify perfectly with the creamed butter and sugar.
Step-by-Step Instructions
Step 1: Whisk the Dry Ingredients
In a large mixing bowl, whisk together the all-purpose flour, baking powder, cornstarch, and salt. Ensuring these are well-combined before adding to the wet ingredients prevents over-mixing the dough later, which is the key to a tender cookie.
Step 2: Cream the Butter and Sugar
In a stand mixer fitted with the paddle attachment (or a large bowl with a hand mixer), beat the softened butter and granulated sugar together on medium-high speed. Continue beating for about 2–3 minutes until the mixture is pale, light, and very fluffy. Scrape down the sides of the bowl to ensure no butter streaks remain.
Step 3: Add the Liquid Aromatics
Add the egg and the vanilla bean paste to the butter mixture. Beat on medium speed for about 1 minute until fully incorporated. You should see thousands of tiny vanilla bean specks distributed evenly throughout the creamed base.
Step 4: Combine Wet and Dry
Turn the mixer to the lowest setting. Gradually add the dry flour mixture to the wet ingredients. Mix only until the flour streaks disappear and a cohesive dough forms.
- Pro Tip: If the dough feels too sticky, add an extra tablespoon of flour, but be careful not to make it too dry or the cookies will crack when rolled.
Step 5: The Mandatory Chill
Divide the dough into two equal discs and wrap them tightly in plastic wrap. Refrigerate for at least 2 hours, but preferably overnight.
- Why Chill? Chilling allows the flour to fully hydrate and the butter to firm back up. Cold dough is essential for getting clean cuts with a shamrock cookie cutter.
Step 6: Roll, Cut, and Bake
Preheat your oven to 350°F (175°C). On a lightly floured surface, roll the dough to a 1/4-inch thickness. Use your shamrock cutters to stamp out the shapes. Place the cookies on a parchment-lined baking sheet and bake for 10–12 minutes.
- The Doneness Test: The cookies are done when the centers look set and matte. Do not wait for the edges to turn brown; these cookies are meant to be pale and elegant.
Secrets to Perfectly Sharp Shamrock Edges
- The “Cold Sheet” Rule: Never place cold dough onto a warm baking sheet. If you are baking in batches, let the sheets cool completely or run them under cold water (and dry them) between uses.
- Flour Your Cutters: Dip your shamrock cutter into a bowl of flour before every single cut. This prevents the “stem” of the shamrock from sticking to the metal and tearing.
- Double Chilling: For the sharpest possible edges, place the cut-out cookies (on the baking sheet) into the freezer for 10 minutes immediately before sliding them into the oven. This “shocks” the butter and ensures zero spread.
- Thickness Consistency: Use “rolling pin rings” or guide sticks to ensure your dough is exactly 1/4-inch thick across the entire sheet. Uneven thickness leads to uneven baking.
Decorating Suggestions
While the vanilla specks make these beautiful on their own, here are three ways to finish your shamrock cookies:
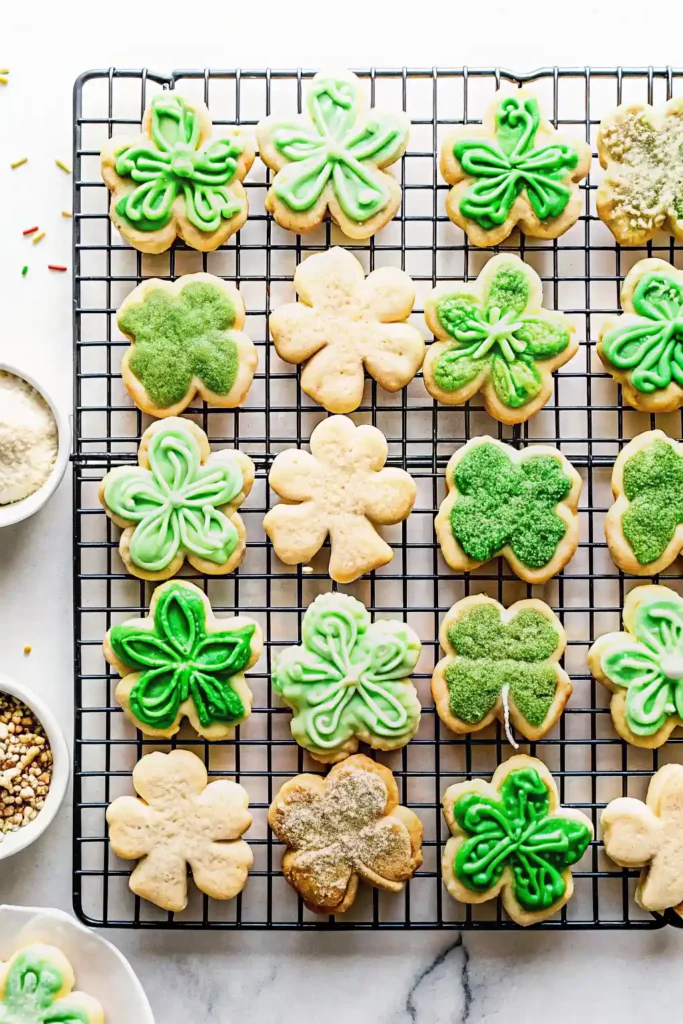
- The Sparkling Sugar Rim: Before baking, brush the edges of the shamrock with a tiny bit of water and dip them into green sanding sugar for a “glittery” festive look.
- The Vanilla Bean Glaze: Whisk 1 cup of powdered sugar with 2 tablespoons of milk and a 1/2 teaspoon of vanilla bean paste. Drizzle over the cooled cookies for a translucent, elegant finish.
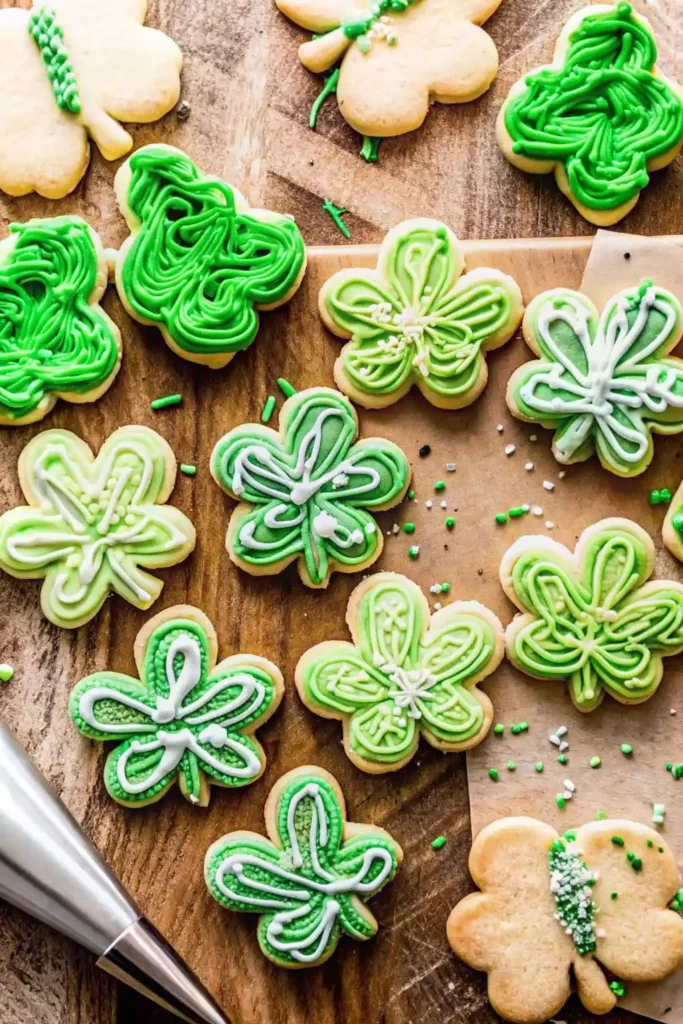
- The Royal Icing Outline: Use a stiff green royal icing to outline the three leaves and the stem, then “flood” the center with a thinner white icing for a high-contrast professional look.
Variations and Substitutions
- Lemon Vanilla: Add 1 tablespoon of fresh lemon zest to the sugar before creaming to add a bright, citrusy lift to the floral vanilla.
- Almond Infusion: Replace half of the vanilla bean paste with pure almond extract for a classic “bakery-style” flavor profile.
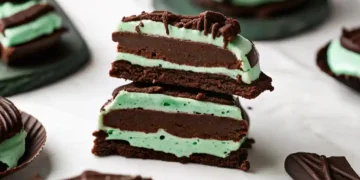
- Chocolate Shamrock: Replace 1/4 cup of the flour with high-quality Dutch-processed cocoa powder.
- Gluten-Free: This recipe works exceptionally well with a 1:1 gluten-free baking flour blend. Because the dough relies on chilling for structure, GF flours hold the shamrock shape beautifully.
Storage and Shelf Life
- Room Temperature: Store baked cookies in an airtight container for up to 1 week. Place a piece of parchment paper between layers to prevent the vanilla aroma from dissipating.
- Freezing Dough: The wrapped dough discs can be frozen for up to 3 months. Thaw in the refrigerator overnight before rolling.
- Freezing Baked Cookies: These cookies freeze perfectly! Store them in a sturdy container for up to 2 months. They are a fantastic “make-ahead” item for big holiday parties.
FAQ
Why did my cookies spread and lose their shamrock shape? This is almost always due to the butter being too soft when the cookies hit the oven. Ensure you chill the dough discs for at least 2 hours and consider the “pre-bake freezer chill” mentioned in the secrets section.
Can I use liquid food coloring to make them green? Yes, but we recommend adding it to the butter and sugar during Step 2. Be aware that liquid dye adds moisture; if the dough becomes too sticky, you may need to add a teaspoon of extra flour.
My cookies are hard and crunchy, not tender. What happened? You likely over-baked them. These cookies should be removed from the oven while they still look slightly soft in the center. They will firm up as they cool on the baking sheet.
How do I get the vanilla bean specks to show up better? The specks are most visible in a pale cookie. Avoid using brown sugar or dark extracts, and ensure you use a “clear” or “white” parchment paper for baking to prevent the bottoms from darkening too much.
Vanilla Bean Shamrock Cookies (The Ultimate Gourmet St. Patrick’s Day Treat)
Ingredients
Equipment
Method
- In a large bowl, whisk together flour, baking powder, cornstarch, and salt until fully combined.
- Beat butter and sugar together on medium-high speed for 2–3 minutes until pale and fluffy. Scrape down the bowl as needed.
- Add the egg and vanilla bean paste. Beat until fully incorporated and evenly speckled with vanilla seeds.
- With the mixer on low speed, gradually add the dry ingredients. Mix just until a cohesive dough forms.
- Divide dough into two discs, wrap tightly, and refrigerate for at least 2 hours or overnight.
- Preheat oven to 350°F (175°C). Roll chilled dough to 1/4-inch thickness on a lightly floured surface. Cut into shamrock shapes and place on parchment-lined baking sheets.
- Bake for 10–12 minutes until centers are set and matte but not browned. Cool on baking sheet for 5 minutes, then transfer to a rack to cool completely.

I have a question, can you contact me at j_genoud@m.spheremail.net ? Cheers!