
Let’s be honest: the holidays are magical, but they are also exhausting. Between the shopping, the wrapping, and the endless list of parties, the idea of spending four hours in the kitchen monitoring a candy thermometer can feel like a breaking point.
Sometimes, you need a win. You need a recipe that delivers “bakery-quality” looks and “gourmet” flavor but requires zero oven time and barely any effort.
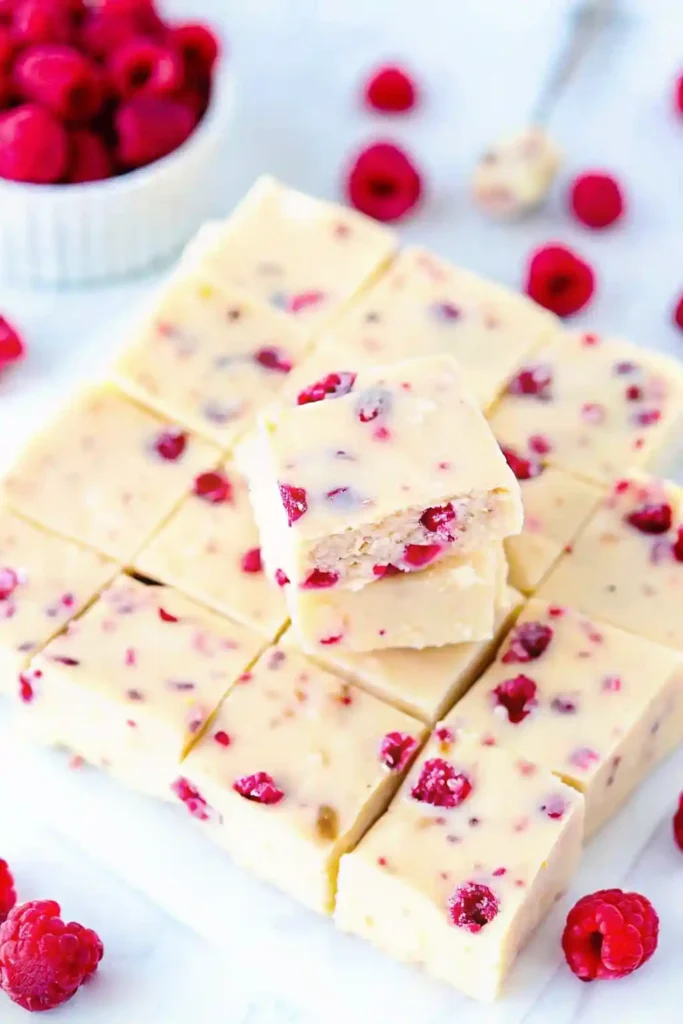
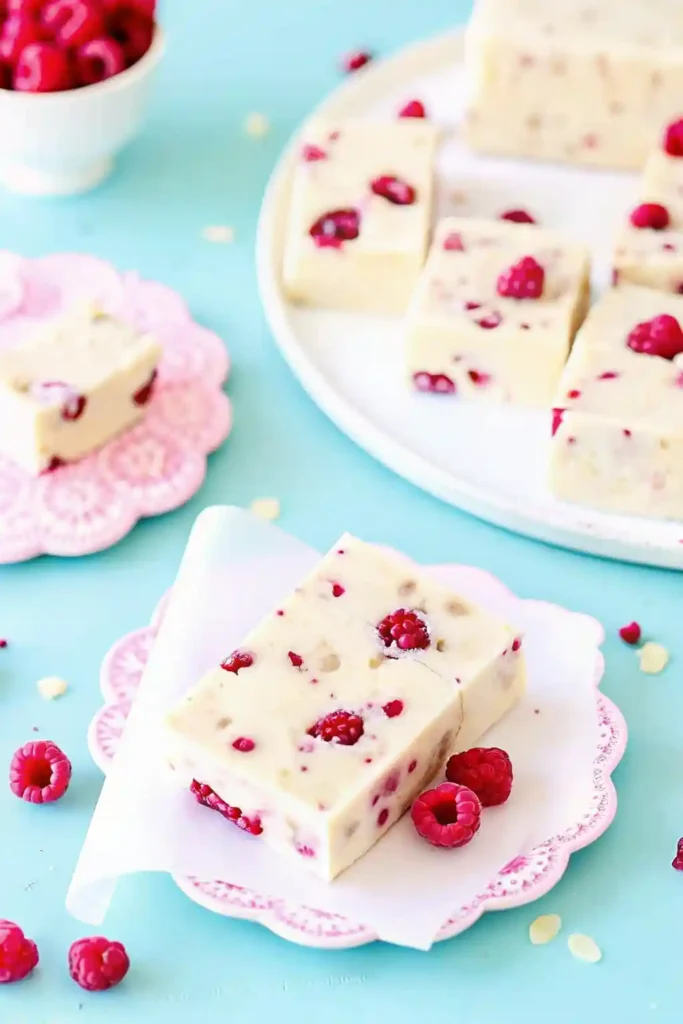
Enter the White Chocolate and Raspberry Fudge Slice.
If you haven’t tried a “fudge slice” before, prepare to have your life changed. Unlike traditional American fudge, which is soft and sugar-based, this style of fudge (popular in Australia and New Zealand) uses sweetened condensed milk and crushed biscuits (cookies) to create a texture that is dense, chewy, crunchy, and creamy all at once.
The star of the show here is the flavor pairing. White chocolate can sometimes be overwhelmingly sweet. However, when you stud it with freeze-dried raspberries, something magical happens. The sharp, tart zing of the berry cuts right through the richness of the chocolate, creating a perfectly balanced bite that is impossible to put down.
Plus, with its snowy white base and vibrant red flecks, it looks absolutely stunning on a Christmas cookie tray.
Why You Will Love This Recipe
- 100% No-Bake: You only need a microwave and a fridge. No oven, no stove, no candy thermometers.
- Texture Heaven: It isn’t just one note. You get the smoothness of the fudge, the crunch of the biscuits, and the crisp pop of the raspberries.
- Foolproof: Because it relies on melted chocolate and biscuits rather than boiling sugar to a specific temperature, it is very hard to mess up.
- Make-Ahead Friendly: This slice actually tastes better after sitting in the fridge for a day, making it perfect for prepping ahead of holiday gatherings.
The Secret Ingredient: Freeze-Dried Raspberries
Before we dive into the “how-to,” we need to talk about the most critical component of this recipe: Freeze-Dried Raspberries.
You might be tempted to use fresh or frozen raspberries. Please do not do this.
Fresh and frozen fruit contain a massive amount of water. If you introduce water to melted white chocolate, the chocolate will “seize” (turn into a lumpy, grainy mess). Even if you manage to mix it in, the moisture will turn your crunchy biscuits soggy within hours, leaving you with a mushy, unappetizing slice.
Freeze-dried raspberries are dehydrated, meaning all the moisture has been removed, but the intense tart flavor and bright red color remain. They stay crisp in the fudge and ensure your slice lasts for over a week in the fridge. You can usually find them in the baking aisle of well-stocked grocery stores or easily order them online.
Ingredients Overview
This recipe uses simple pantry staples to create something extraordinary.
- Sweetened Condensed Milk: This acts as the binding agent and provides the milky, caramel-like sweetness that forms the base of the fudge. (Make sure you buy sweetened condensed milk, not evaporated milk!)
- Butter: Salted butter is best here. It adds richness and helps balance the sugar.
- White Chocolate: Since white chocolate is the primary flavor, quality matters. Avoid “white baking chips” or “almond bark” if possible, as they often contain vegetable oils instead of cocoa butter. Use a good quality bar (like Lindt or Ghirardelli) or high-quality couverture drops.
- Plain Biscuits (Cookies): You want a crisp, plain tea biscuit. In the UK/Australia/NZ, Marie biscuits, Arrowroot, or Malt biscuits are the standard. In the US, Shortbread cookies, Nilla Wafers, or even Golden Oreos (cream removed) work beautifully.
- Freeze-Dried Raspberries: The tart hero of the dish.
- Extra White Chocolate Chips: These are folded in at the end for extra texture chunks.
The Best No-Bake White Chocolate and Raspberry Fudge Slice
Ingredients
Equipment
Method
- Line an 8-inch (20cm) square tin with parchment paper, leaving overhang on two sides for easy lifting.
- In a large microwave-safe bowl, add cubed butter and sweetened condensed milk. Microwave for 1 minute on high, then stir. If butter has not fully melted, microwave for an additional 30 seconds.
- Add chopped white chocolate to the hot condensed milk mixture. Let sit 30 seconds, then stir until smooth. Microwave in 20-second bursts if needed, stirring between each.
- For an ultra-smooth fudge base, beat with an electric mixer for 1–2 minutes to fully emulsify the butter and chocolate.
- Fold in crushed biscuits and white chocolate chips. Then gently fold in freeze-dried raspberries—crushing a few slightly to distribute color, but leaving most whole.
- Press mixture firmly into the prepared tin, smoothing the top. Refrigerate for 2–3 hours until completely firm.
- Lift the block out using the parchment handles. Slice into 16 squares using a sharp, warm knife for clean edges. Serve chilled and store in the refrigerator.
Notes
Step-by-Step Instructions
1. Prepare Your Tin
Start by lining an 8-inch (20cm) square tin with parchment paper. Pro Tip: Leave an overhang of paper on two sides. This creates “handles” that will allow you to lift the entire block of fudge out of the tin once it sets, making cutting nice even squares a breeze.
2. The Melt (Microwave Method)
In a large, microwave-safe bowl, combine your butter (cubed) and the can of sweetened condensed milk. Microwave on high for 1 minute. Remove and stir. If the butter isn’t fully melted, go for another 30 seconds.
Next, add your chopped white chocolate to the hot milk mixture. Let it sit for 30 seconds to soften, then stir gently. If it needs more help, microwave in short 20-second bursts, stirring vigorously in between. Warning: White chocolate burns easily. Be patient and don’t overheat it!
3. The Beat (Optional but Recommended)
If you want a lighter, smoother texture, you can use a handheld electric mixer to beat the chocolate mixture for about 1-2 minutes. This incorporates a little air and ensures the butter is perfectly emulsified with the condensed milk. If you don’t have a mixer, a vigorous whisk by hand works too!
4. The Mix-Ins
Now for the texture. Add your crushed biscuits and the extra white chocolate chips. How to crush: Don’t turn the biscuits into dust! You want chunky rubble—some crumbs, but mostly pea-sized or marble-sized pieces. This gives the slice its signature “stained glass” look when cut.
Finally, gently fold in the freeze-dried raspberries. Crush a few of them in your hand as you add them to distribute the red dust, but keep most of them whole or in large chunks.
5. Set and Chill
Pour the mixture into your prepared tin. Use a spatula to press it down firmly into the corners and smooth the top. Place the tin in the fridge for at least 2 to 3 hours. It needs to be completely firm before you try to cut it.
6. Slice and Serve
Once firm, lift the block out using the parchment paper handles. Place it on a cutting board. using a sharp, heavy knife, cut into 16 squares (or smaller rectangles if you want bite-sized treats).
Tips for the Perfect Slice
Don’t Over-Crush the Biscuits The beauty of this slice is the mosaic look of the interior. If you pulverize the biscuits in a food processor, you will end up with a beige, uniform bar. Put the biscuits in a Ziploc bag and bash them with a rolling pin for that perfect “rough chopped” texture.
Watch the Temperature Let the fudge mixture cool slightly (about 5 minutes) before adding the extra chocolate chips and raspberries. If the mix is boiling hot, the chips will melt completely and vanish, and the raspberries might bleed their color too much, turning the whole slice pink.
Clean Cuts To get those sharp, professional-looking edges, run your knife under hot water and wipe it dry before each cut. The heat melts through the white chocolate smoothly, preventing the top from cracking.
Variations to Try
This base recipe is incredibly versatile. Once you master the method, you can switch up the mix-ins:
- Cookies & Cream: Use crushed Oreos instead of plain biscuits and skip the fruit.
- Lemon Meringue: Add crushed meringue nests and a few drops of lemon extract.
- Pistachio & Cranberry: Swap raspberries for dried cranberries and add ½ cup of shelled pistachios for a classic Christmas color scheme.
- Caramilk/Gold Chocolate: Use caramelized white chocolate (Gold chocolate) instead of regular white chocolate for a toffee-like flavor profile.
Storage and Freezing
One of the best things about this White Chocolate and Raspberry Fudge Slice is its shelf life.
- Fridge: Store in an airtight container in the fridge for up to 1 week. It is best served chilled, as white chocolate can get a bit soft at warm room temperature.
- Freezer: Yes, it freezes! Wrap individual squares or the whole block in plastic wrap and foil. It will last for up to 3 months. Thaw in the fridge overnight before eating.
Frequently Asked Questions
Can I use fresh raspberries? No. As mentioned above, the water content in fresh fruit will ruin the texture of the fudge and make the biscuits soggy. Stick to freeze-dried.
Is this recipe Gluten-Free? It can be! The fudge base itself is naturally gluten-free. Simply swap the plain wheat biscuits for your favorite crunchy Gluten-Free vanilla cookie or shortbread.
Why is my mixture oily? If you overheat white chocolate or butter, the fat can separate. If you see pools of oil, try whisking vigorously or using the electric mixer method mentioned in step 3 to re-emulsify the mixture.


