
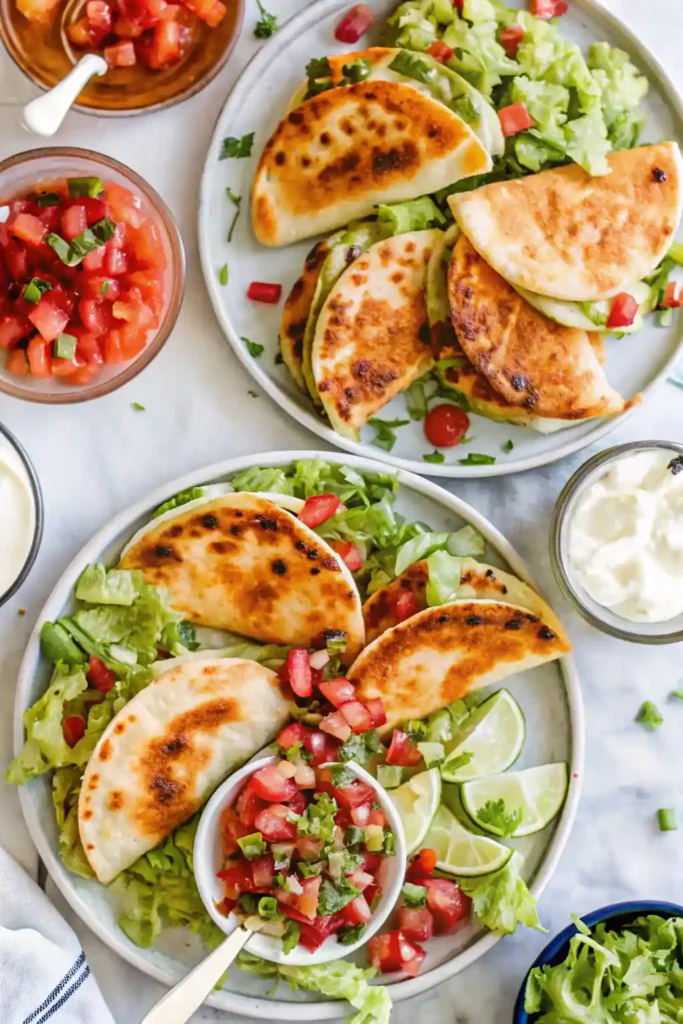
When it comes to the pantheon of comfort food, the quesadilla holds a place of high honor. It is the perfect marriage of crunchy, golden-brown carbohydrates and gooey, melted cheese. However, for parties and large gatherings, a standard-sized quesadilla can be cumbersome to serve and messy to eat. These Mini Chicken Quesadillas solve that problem beautifully, offering all the savory, cheesy goodness of the original in a refined, “pop-able” format that is perfect for grazing.
This recipe is designed for maximum flavor and minimum stress. By using a clever “stamping” technique to create uniform mini tortillas and utilizing pre-cooked shredded chicken, you can assemble a mountain of these appetizers in under thirty minutes. They are baked—not fried—which allows you to cook a massive batch at once while achieving a level of crispiness that rivals any stovetop method. Whether you are hosting a Super Bowl watch party, a festive brunch, or looking for a fun kid-friendly dinner, these mini quesadillas are the ultimate comfort food solution. Let’s dive into the techniques for the perfect golden shell and the best flavor-packed fillings.
Why You’ll Love This Recipe
- The Perfect Party Format: These are designed specifically for entertaining. They are sturdy enough to be eaten with one hand and fit perfectly on a small appetizer plate.
- Effortless Prep: By using rotisserie chicken and store-bought tortillas, you cut your prep time in half, making this an ideal recipe for busy hosts.
- Better-Than-Fried Texture: Baking the quesadillas on a high-heat sheet pan ensures a consistent, golden-brown crunch across the entire batch without the need for hovering over a greasy skillet.
- Highly Customizable: While our version features a classic spiced chicken and jack cheese filling, the base method works with everything from pulled pork to roasted vegetables.
- Make-Ahead Friendly: You can assemble these hours in advance and simply pop them in the oven when your guests arrive.
Ingredient Notes & Pro Selections
The beauty of a quesadilla lies in its simplicity, which is why the quality of your staples—tortillas, cheese, and seasoning—is so critical.
The Tortillas
For mini quesadillas, we recommend using Large Flour Tortillas (Burrito Size).
- The Technique: You don’t need to hunt for tiny street taco shells. Instead, use a 3-inch biscuit cutter or the rim of a sturdy glass to “stamp out” small rounds from the larger tortillas. This gives you a cleaner, more professional edge and allows the quesadilla to seal more tightly.
- Flour vs. Corn: While corn tortillas are traditional, flour tortillas are preferred for this “mini” method because they are more pliable and won’t crack when you fold them over the filling.
The Protein & Filling
- Shredded Chicken (2 Cups): A rotisserie chicken is your best friend here. Shred both the breast and thigh meat for a mix of textures.
- Monterey Jack & Sharp Cheddar: We recommend a 50/50 blend. Monterey Jack provides the “gooey” melt, while sharp cheddar provides the salty, savory punch that cuts through the starch.
- The “Glue”: We add a tablespoon of sour cream or cream cheese to the shredded chicken mixture. This acts as a binder, ensuring the filling stays inside the mini shell rather than falling out during the first bite.
The Aromatics & Spices
- Taco Seasoning: Use a high-quality blend (or homemade) with plenty of cumin, chili powder, and smoked paprika.
- Fresh Cilantro & Green Onions: These add a burst of freshness that prevents the quesadillas from tasting too heavy or one-dimensional.
- Salsa or Pico de Gallo: Stirring a tablespoon of your favorite salsa directly into the chicken mix provides moisture and acidity.
Step-by-Step Instructions
Step 1: Prep the Tortilla Rounds
Preheat your oven to 400°F (204°C). Line two large rimmed baking sheets with parchment paper. Lay your large flour tortillas on a clean work surface. Using a 3-inch round cutter, stamp out as many circles as possible from each tortilla (usually 4–5 per burrito shell).
Step 2: Mix the Savory Filling
In a large mixing bowl, combine the shredded chicken, 1 cup of the cheese blend, taco seasoning, finely chopped green onions, and a tablespoon of salsa. Stir until the chicken is evenly coated. The mixture should be “tacky”—it should hold together when pinched, ensuring it doesn’t spill out during the baking process.
Step 3: Assembly
Place the mini tortilla rounds on the prepared baking sheets. Add a small pinch of the remaining cheese to one half of the round. Place about 1 tablespoon of the chicken mixture on top of that cheese, then add another tiny pinch of cheese over the chicken.
- Pro Tip: Putting cheese on both the top and bottom of the chicken acts as a “double-sided tape” that keeps the folded tortilla sealed shut.
Step 4: The Fold and Press
Fold the tortilla over the filling to create a half-moon shape. Press down firmly with your fingers or the back of a spoon to flatten. Lightly brush the tops of the folded quesadillas with melted butter or a quick spritz of olive oil spray. This is the secret to getting that deep mahogany color and a “fried” crunch in the oven.
Step 5: Bake to Golden Perfection
Bake for 10–12 minutes. At the 6-minute mark, flip the quesadillas over to ensure both sides get direct contact with the hot parchment paper. The quesadillas are done when the edges are crispy and the cheese has begun to bubble out slightly and caramelize.
Step 6: Serve
Remove from the oven and let them rest for 2 minutes—this allows the cheese to set so the filling doesn’t slide out. Serve warm with plenty of dipping sauces.

Secrets to the Perfect Golden Tortilla
- The Weight Method: If you find your mini tortillas are “springing” open in the oven, place a second baking sheet directly on top of the quesadillas for the first 5 minutes of baking. This flattens them and seals the cheese before removing the top pan to allow them to crisp.
- Butter Over Oil: While oil works, brushing the tops with melted salted butter provides a superior flavor and a more delicate, flaky crunch than vegetable oil.
- High-Heat Environment: Do not bake these at 350°F. You need 400°F to sear the outside before the interior chicken becomes dry.
- The “Fine Shred” Cheese: Use a fine-grate on your cheese rather than thick shreds. Fine cheese melts faster and more evenly, creating a better seal for these tiny appetizers.
Dipping Sauces and Pairings
A mini quesadilla is a vehicle for sauce. To elevate these into a true comfort food experience, offer a variety of dips:
- Creamy Avocado Lime: Blend one ripe avocado with 1/2 cup sour cream, juice of one lime, and a handful of cilantro until smooth.
- Chipotle Crema: Mix 1/2 cup Greek yogurt with 1 teaspoon of adobo sauce (from a can of chipotles) and a pinch of salt.
- Standard Trio: You can’t go wrong with the classics—Guacamole, Sour Cream, and Roasted Tomato Salsa.
Variations and Substitutions
- Vegetarian “Black Bean”: Swap the chicken for a can of black beans (rinsed and slightly mashed) mixed with roasted corn and diced red bell peppers.
- Breakfast Style: Fill the rounds with scrambled eggs, cooked chorizo, and pepper jack cheese. Serve with a side of maple syrup or salsa verde.
- Steak and Onion: Use finely chopped leftover steak and caramelized onions for a more sophisticated “Philly” style quesadilla.
- Gluten-Free: While harder to fold, you can use high-quality gluten-free flour tortillas. Brush them with a little water and microwave them for 10 seconds before folding to prevent cracking.
Storage and Reheating
- Refrigerator: Store leftover mini quesadillas in an airtight container for up to 3 days.
- Freezing: These are excellent for meal prep! Freeze the assembled (but unbaked) quesadillas in a single layer on a tray, then transfer to a freezer bag. Bake directly from frozen, adding an extra 3–5 minutes to the oven time.
- Reheating: To maintain the crunch, reheat them in an air fryer at 350°F for 4 minutes or in a dry skillet over medium heat for 2 minutes per side. Avoid the microwave, as it will make the tortillas rubbery.
FAQ
Can I use corn tortillas? Yes, but you must steam them first to make them pliable, and they are much more likely to break during the folding process. Flour is the gold standard for this “mini” method.
How do I prevent the cheese from leaking? Don’t overfill! It’s tempting to pack them full, but 1 tablespoon of filling is the limit for a 3-inch round. Also, ensure you press the edges firmly after folding.
Can I make these in an air fryer? Absolutely. Place them in a single layer and air fry at 370°F for 6–8 minutes, flipping halfway through.
Why are my tortillas soggy? This usually happens if your chicken mixture is too wet. Drain any excess salsa or lime juice before mixing the filling, and ensure you use a high-heat oven (400°F).

Crispy Mini Chicken Quesadillas
Ingredients
Equipment
Method
- Preheat oven to 400°F (204°C). Line two baking sheets with parchment paper. Use a 3-inch round cutter to stamp mini rounds from the flour tortillas.
- In a bowl, mix shredded chicken, 1 cup of the cheese, taco seasoning, salsa, and green onions until evenly combined.
- Place tortilla rounds on baking sheets. Add a small pinch of cheese, 1 tablespoon of chicken mixture, then another pinch of cheese.
- Fold tortillas into half-moons and press gently to seal. Brush tops lightly with melted butter or spray with olive oil.
- Bake for 10–12 minutes, flipping halfway through, until golden brown and crispy.
- Cool for 2 minutes before serving. Serve warm with salsa, guacamole, or sour cream.


