When it comes to the hierarchy of sports-viewing snacks, chicken wings sit firmly on the throne. However, the traditional way of serving them—piled into a greasy bowl—often lacks the visual appeal and variety that a modern “Game Day” host desires. This Chicken Wings Board transforms a classic finger food into a stunning, interactive centerpiece. By arranging multiple flavors of crispy wings alongside an array of colorful crudités and dipping sauces, you create a feast that caters to every palate, from the heat-seekers to the ranch-lovers.
The beauty of the board format is that it solves the “soggy wing” dilemma while offering a balanced meal. The cool, crisp snap of celery and carrots provides a necessary respite from the spicy buffalo and sweet barbecue glazes. Whether you are prepping for the Super Bowl or a weekend tailgate at home, this guide will show you how to achieve a restaurant-quality “air-fried” crunch and the professional secrets to mapping a board that stays looking fresh until the final whistle. Let’s dive into the science of the “no-fry” crisp and the art of the wingscaping.
Why You’ll Love This Recipe
- Flavor Variety: Instead of committing to one sauce, this board allows you to serve three or four distinct glazes, ensuring every guest finds their favorite.
- Healthier Crunch: By using an oven-baked or air-fryer method with a secret leavening agent, you get deep-fried results without the mess or heavy oils.
- The Ultimate Social Meal: Boards encourage communal eating and “grazing,” making it easier for guests to serve themselves without interrupting the game.
- Vibrant & Balanced: The inclusion of fresh vegetables and diverse colors makes this much more visually enticing than a standard platter of brown food.
- Make-Ahead Components: You can prep the sauces and chop the vegetables a day in advance, leaving only the wing-roasting for game day.
Ingredient Notes & Pro Selections
The quality of your wings and the texture of your coating are the most important factors for a successful board.
The Wings
- Fresh “Party Wings”: Look for packs already separated into “flats” and “drums.” If you buy whole wings, you will need to remove the tips and separate the joints yourself.
- Patting Dry: This is the most important prep step. Moisture is the enemy of crispiness. Use paper towels to get the skin as dry as possible before seasoning.
The “Crispy” Secret
- Baking Powder (Aluminum-Free): This is the scientific “hack” for crispy skin. The baking powder raises the pH of the skin, breaking down the peptide bonds and allowing it to crisp up like it was deep-fried. Note: Do not use baking soda, which will leave a bitter taste.
The Flavor Trio
To make a high-impact board, we recommend three distinct profiles:
- Classic Buffalo: Frank’s RedHot mixed with melted butter and a dash of garlic powder.
- Honey Garlic or Teriyaki: A sweet, sticky glaze that appeals to kids and those who avoid spice.
- Lemon Pepper Dry Rub: Provides a zesty, savory alternative for those who don’t want “saucy” fingers.
The Board Foundations
- Dips: Standard Ranch and Blue Cheese are non-negotiable. For a gourmet twist, add a small bowl of spicy hot honey or a creamy avocado lime dip.
- Crudités: Go beyond celery. Include rainbow carrots, radishes, snap peas, and even sliced cucumbers for a refreshing crunch.
Step-by-Step Instructions
Step 1: The “Drying” Phase
For the absolute best results, pat your wings dry and place them on a wire rack over a baking sheet in the refrigerator for 4 hours (or overnight) uncovered. This air-dries the skin, ensuring it shatters when bitten.
Step 2: Season and Coat
Preheat your oven to 425°F (220°C) or your air fryer to 400°F (200°C). In a large bowl, toss the dry wings with 1 tablespoon of baking powder and 1 teaspoon of salt per pound of wings. Toss until every wing has a light, dusty coating.
Step 3: The High-Heat Roast
Place the wings on a wire rack set inside a rimmed baking sheet. Bake for 45–50 minutes, flipping halfway through.
- The Doneness Test: The wings should be a deep golden brown and the skin should sound “hollow” or “crispy” when tapped with a fork.
Step 4: Saucing the Batches
While the wings are hot, divide them into bowls. Toss one batch in Buffalo sauce, one in BBQ or Honey Garlic, and leave the final batch for a Lemon Pepper seasoning toss.
- Pro Tip: Saucing them while they are piping hot allows the glaze to set and adhere to the crispy skin.
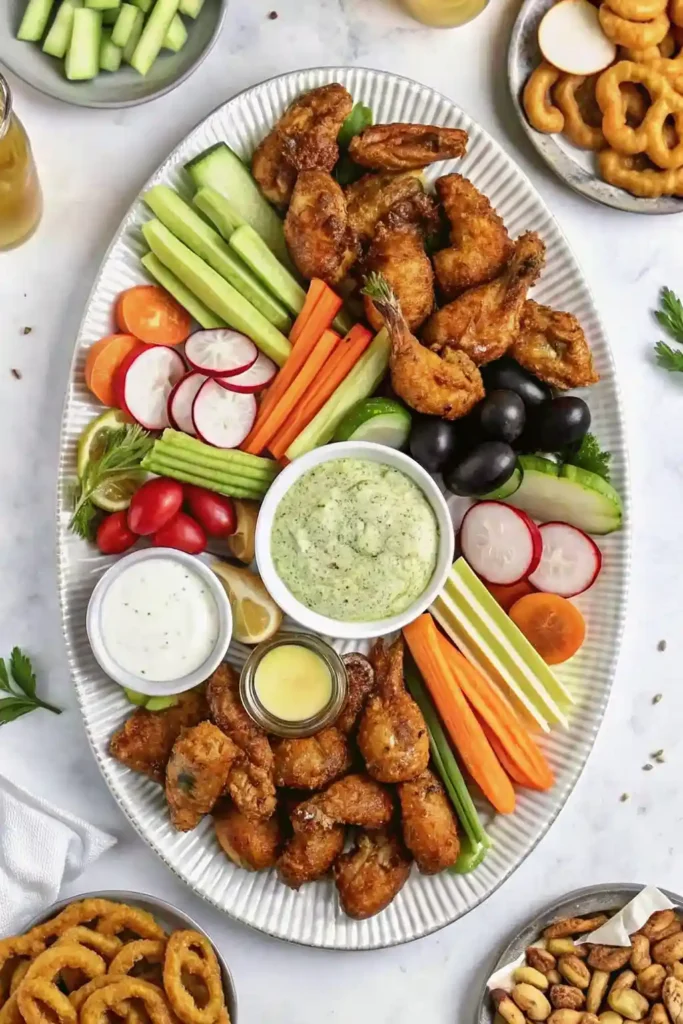
Step 5: Mapping the Board
Place your bowls of Ranch and Blue Cheese on a large wooden board first to act as “anchors.” Arrange the different flavors of wings in distinct piles.
- The Barrier: Place your celery and carrots between the different wing flavors to prevent the sauces from running into each other.
Step 6: Final Fillers and Garnish
Fill any small gaps with extra radishes or snap peas. Sprinkle the buffalo wings with blue cheese crumbles and the honey garlic wings with sesame seeds and scallions. Serve immediately.
Secrets to a Pro-Level Wings Board
- The Wire Rack Rule: Never bake wings directly on a flat sheet or parchment paper. Lifting them up on a wire rack allows hot air to circulate 360 degrees, ensuring the bottom is just as crispy as the top.
- Sauce on the Side: If you are worried about the wings losing their crunch over a long game, serve the wings “naked” and put all the sauces in small ramekins for dipping.
- Color Blocking: Use the “Rainbow Rule.” Group all the orange carrots together, all the green celery together, and all the red radishes together. This creates a clean, intentional look that mimics high-end catering.
- Wet Wipes are a Garnish: A professional touch is to include a small bowl of lemon-scented wet wipes or damp napkins on the side of the board for your guests.
Variations and Substitutions
- Keto/Low-Carb: This recipe is naturally keto-friendly as long as you use sugar-free BBQ sauce and buffalo sauce. Avoid the teriyaki or honey-based glazes.
- Vegetarian “Wings”: Follow our Crispy Buffalo Cauliflower Bites recipe and add them to the board for your plant-based guests.
- International Flair: Use a Gochujang glaze for a Korean Fried Chicken vibe or a dry rub of Za’atar and lemon for a Mediterranean twist.
Storage and Reheating
- Refrigerator: Store leftover wings in an airtight container for up to 3 days. Store the vegetables separately in a damp paper towel inside a Ziploc bag to keep them crisp.
- Reheating: Do not use the microwave. To bring the crunch back, place the wings in an air fryer at 375°F for 4–5 minutes or in a 400°F oven for 8 minutes.
FAQ
Can I use frozen wings? Yes, but you must thaw them completely and pat them extremely dry. Frozen wings hold more moisture, so they may need an extra 5–10 minutes of cook time to reach peak crispiness.
Why did my wings taste like metallic soap? This happens if you used too much baking powder or a brand that contains aluminum. Ensure you use exactly 1 tablespoon per pound and verify the label is “Aluminum-Free.”
How many wings per person should I plan for? For a board-style meal, plan on 8 to 10 wings per person. If the board is just an appetizer before a main course, 4 to 6 wings per person is sufficient.
Is it safe to leave the board out for the whole game? Per food safety guidelines, cooked meat should not sit at room temperature for more than 2 hours. If the game goes long, consider putting out half the wings at kickoff and the second half at halftime.
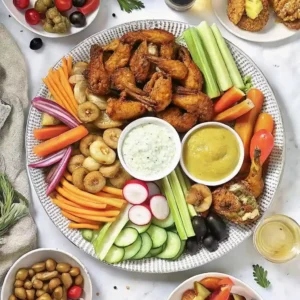
Ultimate Chicken Wings Board
Ingredients
Equipment
Method
- Pat chicken wings completely dry with paper towels. For best results, place wings on a wire rack and refrigerate uncovered for at least 4 hours or overnight.
- Preheat oven to 425°F (220°C) or air fryer to 400°F (200°C). Toss wings with baking powder and salt until evenly coated.
- Arrange wings on a wire rack set over a baking sheet. Bake for 45–50 minutes, flipping halfway through, until deeply golden and crispy.
- Divide hot wings into separate bowls. Toss one batch with buffalo sauce, one with barbecue or honey garlic sauce, and season the remaining batch with lemon pepper.
- Place ranch and blue cheese dressings in small bowls on a large serving board. Arrange wing flavors in distinct sections.
- Add celery, carrots, radishes, and snap peas between wing sections to separate flavors and add crunch.
- Finish with optional garnishes like blue cheese crumbles, sesame seeds, or green onions. Serve immediately.


