
I’ll never forget the first time Marcus and I ordered chocolate mousse at this fancy French restaurant in downtown Portland. We were celebrating our anniversary, and when the server brought out these tiny glass cups filled with the most luxurious, silky chocolate mousse I’d ever tasted, I literally closed my eyes with that first spoonful.
The texture was impossibly light yet rich at the same time, and the chocolate flavor was so deep and intense. I turned to Marcus and said, “I’m making this at home.” He laughed, thinking I was joking. Three weeks and five recipe tests later, I nailed it. This chocolate mousse recipe is hands-down the best I’ve ever made, and it’s honestly easier than you’d think.
Why This Chocolate Mousse Recipe Works
Here’s what makes this recipe different from others I’ve tried: we’re actually making a proper French mousse, which means starting with a cooked custard base. I know that sounds intimidating (trust me, I thought so too at first), but it’s what gives you that restaurant-quality texture. The custard base adds richness and stability that you just don’t get from recipes that use only raw eggs or shortcuts with gelatin.
The other secret? Good chocolate and lots of it. I use a high-quality dark chocolate around 60-70% cacao, and it makes all the difference. You’re not baking this or mixing it with a ton of other ingredients, so the chocolate flavor really shines through. And because we’re folding in whipped cream at the end, you get this incredibly airy, mousse-like texture that’s just heaven.
Plus, this is a make-ahead champion. You can prepare the mousse up to three days before you need it, which makes it perfect for dinner parties or special occasions when you don’t want to be frantically cooking dessert while your guests are waiting. Just add the whipped cream topping right before serving, and everyone will think you’re some kind of dessert wizard.
Choosing Your Chocolate
This is not the place to use your everyday chocolate chips from the pantry. I learned this the hard way on my first attempt when I tried using semi-sweet chips and ended up with a grainy texture that just wasn’t right. Chocolate chips contain stabilizers that prevent them from melting smoothly, which is great for cookies but terrible for mousse.
For the best results, I always reach for a bar of good quality dark chocolate. My go-to brands are Ghirardelli (you can find it at most grocery stores) or Lindt when I’m feeling fancy. Look for something in the 60-70% cacao range – any higher and it can taste too bitter, any lower and your mousse might end up too sweet.
Here’s my rule of thumb: if you wouldn’t happily eat a square of that chocolate on its own, don’t use it in this recipe. The chocolate is the star here, so you want something that tastes amazing. I know it costs a bit more, but you’re only using 14 ounces total, and the difference in the final result is absolutely worth it.
Ingredients You’ll Need
For the Chocolate Mousse Base:
- 14 ounces dark chocolate (60-70% cacao), finely chopped
- 8 large egg yolks, at room temperature
- 1/2 cup granulated sugar
- 4 cups heavy cream, divided
- 1 tablespoon vanilla extract
- 2 teaspoons espresso powder (optional but highly recommended)
- 1/2 teaspoon salt
For the Whipped Cream Topping:
- 1 and 1/2 cups heavy cream
- 1/2 cup confectioners’ sugar
- Chocolate shavings or cocoa powder for garnish
Recipe Details:
- Prep Time: 20 minutes
- Cook Time: 10 minutes
- Chill Time: 2 hours (or up to 3 days)
- Total Time: 2 hours 30 minutes
- Servings: 8 generous portions
- Difficulty: Medium (don’t let it intimidate you!)
Step-by-Step Instructions
1. Prep Your Chocolate
Finely chop your chocolate and place it in a large heatproof bowl. Set it aside near your stove – you’ll need it soon. The finer you chop the chocolate, the more evenly it’ll melt when you add the hot cream mixture.
2. Make the Egg Mixture
In a separate large bowl, beat the egg yolks and granulated sugar together with a hand mixer on medium-high speed. Beat this for about 3-4 minutes until it’s thick, smooth, and has lightened to a pale yellow color. It should form ribbons when you lift the beaters. This step is important because you’re incorporating air that’ll help give your mousse that light texture.
3. Heat the Cream
In a medium saucepan over medium heat, warm 2 and 1/2 cups of the heavy cream until it just starts to steam and tiny bubbles form around the edges. You want it hot but not boiling – if it boils, you risk curdling when you add it to the eggs. Watch it closely and remove it from the heat as soon as you see those first signs of simmering.
4. Temper the Eggs (Don’t Skip This!)
This is the part that sounds fancy but is actually super straightforward. Remove the hot cream from heat and very slowly whisk about half of it into your egg mixture, whisking constantly. I mean really slowly – pour in just a thin stream while you keep whisking. This gradually brings up the temperature of the eggs without scrambling them. (Ask me how I know scrambled eggs in chocolate mousse is a bad time. My first attempt was… educational.)
5. Cook the Custard
Pour the tempered egg mixture back into the saucepan with the remaining cream. Return the pan to medium heat and cook, stirring constantly with a wooden spoon or heat-resistant spatula. Keep stirring and scraping the bottom and sides of the pan. After about 5 minutes, the mixture should thicken enough to coat the back of your spoon. When you draw a line through the custard on the spoon, it should hold its shape. Do not let this boil, or you’ll end up with sweet scrambled eggs.
6. Combine with Chocolate
Slowly pour the warm custard over your chopped chocolate. Let it sit for about 30 seconds (this lets the heat start melting the chocolate), then stir gently until the chocolate is completely melted and the mixture is silky smooth. Stir in the vanilla extract, espresso powder (if using), and salt. The espresso powder is my secret weapon – it doesn’t make it taste like coffee, but it intensifies that chocolate flavor in the best way.
7. Chill the Mixture
Cover the bowl tightly with plastic wrap, pressing it directly onto the surface of the chocolate mixture to prevent a skin from forming. Refrigerate for at least 2 hours until it’s completely cold. I usually make this part in the morning or even the night before.
8. Whip the Cream
Once your chocolate mixture is thoroughly chilled, it’s time for the magic part. In a clean bowl, beat the remaining 1 and 1/2 cups of heavy cream with an electric mixer on medium-high speed. Start on medium to avoid splattering, then increase to high. Beat until stiff peaks form – when you lift the beaters, the cream should stand up in peaks that hold their shape. This usually takes about 3-4 minutes.
9. Fold It Together
This step requires a gentle touch. Add about a third of the whipped cream to your chocolate mixture and fold it in gently with a rubber spatula, using a motion that cuts down through the middle, then sweeps along the bottom and up the side. This first addition lightens the chocolate mixture. Then add the remaining whipped cream and fold until you don’t see any white streaks, but don’t overmix – you want to keep all that airiness you just whipped in.
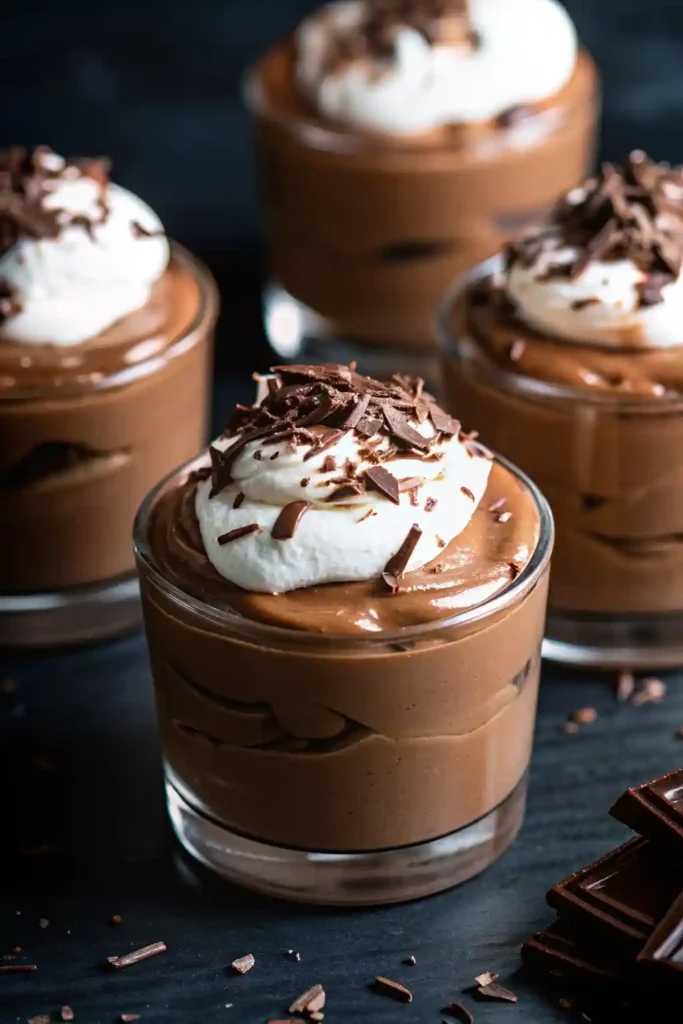
10. Serve or Store
Spoon the mousse into individual serving glasses, ramekins, or dessert cups. You can serve it right away, or cover and refrigerate for up to 3 days. When you’re ready to serve, make the whipped cream topping.
Making the Whipped Cream Topping
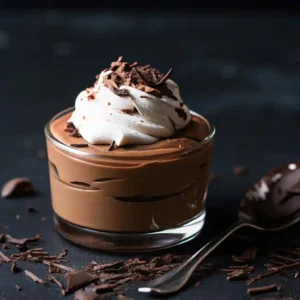
In a clean bowl, beat the 1 and 1/2 cups of heavy cream with the confectioners’ sugar until medium-stiff peaks form. The powdered sugar helps stabilize the whipped cream so it stays fluffy on top of your mousse. Spoon or pipe it onto each serving, then finish with chocolate shavings or a light dusting of cocoa powder.
Pro tip: to make chocolate shavings, use a vegetable peeler on a room-temperature chocolate bar. Hold the chocolate with a paper towel so your warm hands don’t melt it, and pull the peeler along the narrow side of the bar.
Tips for Perfect Chocolate Mousse
Tempering Is Your Friend: I cannot stress this enough – slowly adding the hot cream to the eggs is crucial. Rush this step and you’ll get bits of cooked egg in your mousse. Not cute.
Use Room Temperature Eggs: This helps them incorporate better and reduces the risk of curdling. I just set mine on the counter while I prep everything else.
Don’t Over-Fold: When you’re combining the whipped cream and chocolate, fold just until combined. Over-folding will deflate your whipped cream and you’ll lose that airy texture.
Quality Matters: Since chocolate is the star here, don’t cheap out. You’ll absolutely taste the difference between good chocolate and mediocre chocolate.
The Espresso Trick: Even if you don’t like coffee, try the espresso powder. Two teaspoons isn’t enough to make it taste like coffee – it just makes the chocolate taste more intensely chocolatey. Marcus didn’t even realize I’d added it until I told him.
Chill Thoroughly: That two-hour minimum chill time isn’t a suggestion. The chocolate mixture needs to be completely cold before you fold in the whipped cream, or the cream will deflate and you’ll lose that mousse texture.

Variations to Try
Peppermint Chocolate Mousse: Add 1/4 teaspoon peppermint extract along with the vanilla. Top with crushed candy canes during the holidays. This is gorgeous for Christmas dinner.
Orange Chocolate Mousse: Add 1 tablespoon of orange zest to the custard as it cooks, and a tablespoon of Grand Marnier or Cointreau when you add the vanilla. Fancy and delicious.
Mexican Chocolate Mousse: Add a pinch of cinnamon and a tiny pinch of cayenne pepper with the espresso powder. The warmth is subtle but amazing.
White Chocolate Mousse: Use high-quality white chocolate instead (I like Ghirardelli’s white chocolate baking bars). Skip the espresso powder. The technique is exactly the same.
Serving Suggestions
This chocolate mousse is incredibly rich, so a little goes a long way. I like serving it in small dessert glasses or ramekins – those 5-6 ounce portions are perfect.
It’s amazing on its own, but here are some of my favorite ways to dress it up:
- Fresh raspberries or strawberries on top (the tartness cuts through the richness beautifully)
- A drizzle of salted caramel sauce
- Crushed amaretti cookies or pirouette cookies as a garnish
- A shot of espresso poured over it for an affogato-style dessert
- Crumbled graham crackers on the bottom for a s’mores vibe
For wine pairing, Marcus and I love this with a ruby port or a late-harvest Zinfandel. The sweetness complements the chocolate without overwhelming it.
Storage and Make-Ahead Tips
Here’s where this recipe really shines for entertaining. You can make the mousse up to 3 days in advance. Just cover each serving tightly with plastic wrap and keep them refrigerated. Don’t add the whipped cream topping until right before serving – make it fresh so it’s fluffy and gorgeous.
The mousse itself doesn’t freeze well because of the whipped cream, but honestly, with it lasting 3 days in the fridge, I’ve never needed to freeze it. (Plus, it’s so good that it rarely lasts more than a day in our house anyway.)
If you have leftover whipped cream topping, store it in an airtight container in the fridge for up to 2 days. It might deflate slightly, but you can give it a quick re-whip before using.
Frequently Asked Questions
Can I use milk chocolate instead of dark chocolate? I’d stick with dark chocolate for the best results. Milk chocolate is sweeter and has a lighter flavor that can get lost in this recipe. If you prefer a sweeter mousse, use a chocolate on the lower end of the spectrum – around 60% cacao instead of 70%.
Do I have to use the espresso powder? No, but I highly recommend it! It really deepens the chocolate flavor without making it taste like coffee. If you’re dead set against it though, you can leave it out.
Can I make this without raw eggs? Great news – you’re not using raw eggs! The eggs are cooked into a custard, so they’re completely safe. The custard reaches a temperature that cooks the eggs through.
My chocolate mixture won’t melt smoothly – help! This usually happens if your cream mixture isn’t hot enough. Pour it back into the pan and heat it gently, stirring constantly, until the chocolate melts completely.
Can I halve this recipe? Absolutely! Just halve all the ingredients. It’ll serve 4 people with generous portions.
Classic French Chocolate Mousse
Ingredients
Equipment
Method
- Finely chop the dark chocolate and place it in a large heatproof bowl. Set aside near the stove.
- In a large bowl, beat egg yolks and granulated sugar on medium-high speed until thick, pale, and ribbon-like, about 3–4 minutes.
- Heat 2½ cups of heavy cream in a saucepan over medium heat until steaming with bubbles around the edges. Do not boil.
- Slowly whisk about half of the hot cream into the egg mixture to temper it, whisking constantly.
- Return the egg mixture to the saucepan and cook over medium heat, stirring constantly, until thick enough to coat the back of a spoon (about 5 minutes). Do not boil.
- Pour the warm custard over the chopped chocolate. Let sit 30 seconds, then stir until smooth. Add vanilla, espresso powder, and salt.
- Cover with plastic wrap pressed directly onto the surface and refrigerate for at least 2 hours until completely cold.
- Whip the remaining 1½ cups of heavy cream to stiff peaks.
- Fold one-third of the whipped cream into the chocolate mixture to lighten it, then gently fold in the remaining cream until just combined.
- Spoon mousse into serving glasses. Serve immediately or refrigerate up to 3 days.
- Whip topping cream with confectioners’ sugar to medium-stiff peaks. Spoon or pipe onto mousse and garnish before serving.


