Oh my goodness, are you ready to create the most AMAZING peanut butter cookies that’ll make the store-bought version hide in shame? Let’s dive into peanut butter paradise with these irresistible homemade Nutter Butters!

Why You’ll Go Nuts For These Cookies
Listen, I’m a peanut butter fiend, and these sandwich cookies hit EVERY note:
- That perfect crisp-yet-tender cookie texture you dream about
- Double peanut butter magic (in both the cookie AND filling!)
- The satisfaction of saying “I made these from scratch!”
- Customizable shapes (classic peanut shape or whatever your heart desires!)
The Must-Have Ingredients
For Those Perfect Cookies:
- 1 cup unsalted butter, softened (trust me, real butter makes ALL the difference!)
- 1 cup creamy peanut butter (the good stuff, not the super processed kind)
- 1 cup granulated sugar
- 1 cup packed brown sugar (this gives that caramel-like depth!)
- 2 large eggs, room temperature
- 1 teaspoon vanilla extract
- 3 cups all-purpose flour
- 1 teaspoon baking powder
- 1/2 teaspoon baking soda
- 1/2 teaspoon salt
For That Dreamy Filling:
- 1/2 cup unsalted butter, softened
- 1 cup creamy peanut butter
- 2 cups powdered sugar
- 3-4 tablespoons milk
- 1 teaspoon vanilla extract

Let The Baking Adventure Begin!
- Prep Your Battlestation – Preheat that oven to 350°F and line your baking sheets with parchment paper. (I learned the hard way that these stick without it!)
- Create Cookie Magic – In your mixing bowl, cream together the butter, peanut butter, and both sugars until they’re fluffy and lighter in color—about 3 minutes on medium speed. Don’t rush this step! It’s what creates that beautiful texture.
- Add Some Love – Beat in those eggs one at a time, then pour in the vanilla. The mixture should look glossy and smooth—almost like a peanut butter cloud!
- The Dry Team Enters – In a separate bowl, whisk your flour, baking powder, baking soda, and salt. Gradually add this to your wet mixture, mixing just until combined. You’ll have a beautifully pliable dough that smells like heaven.
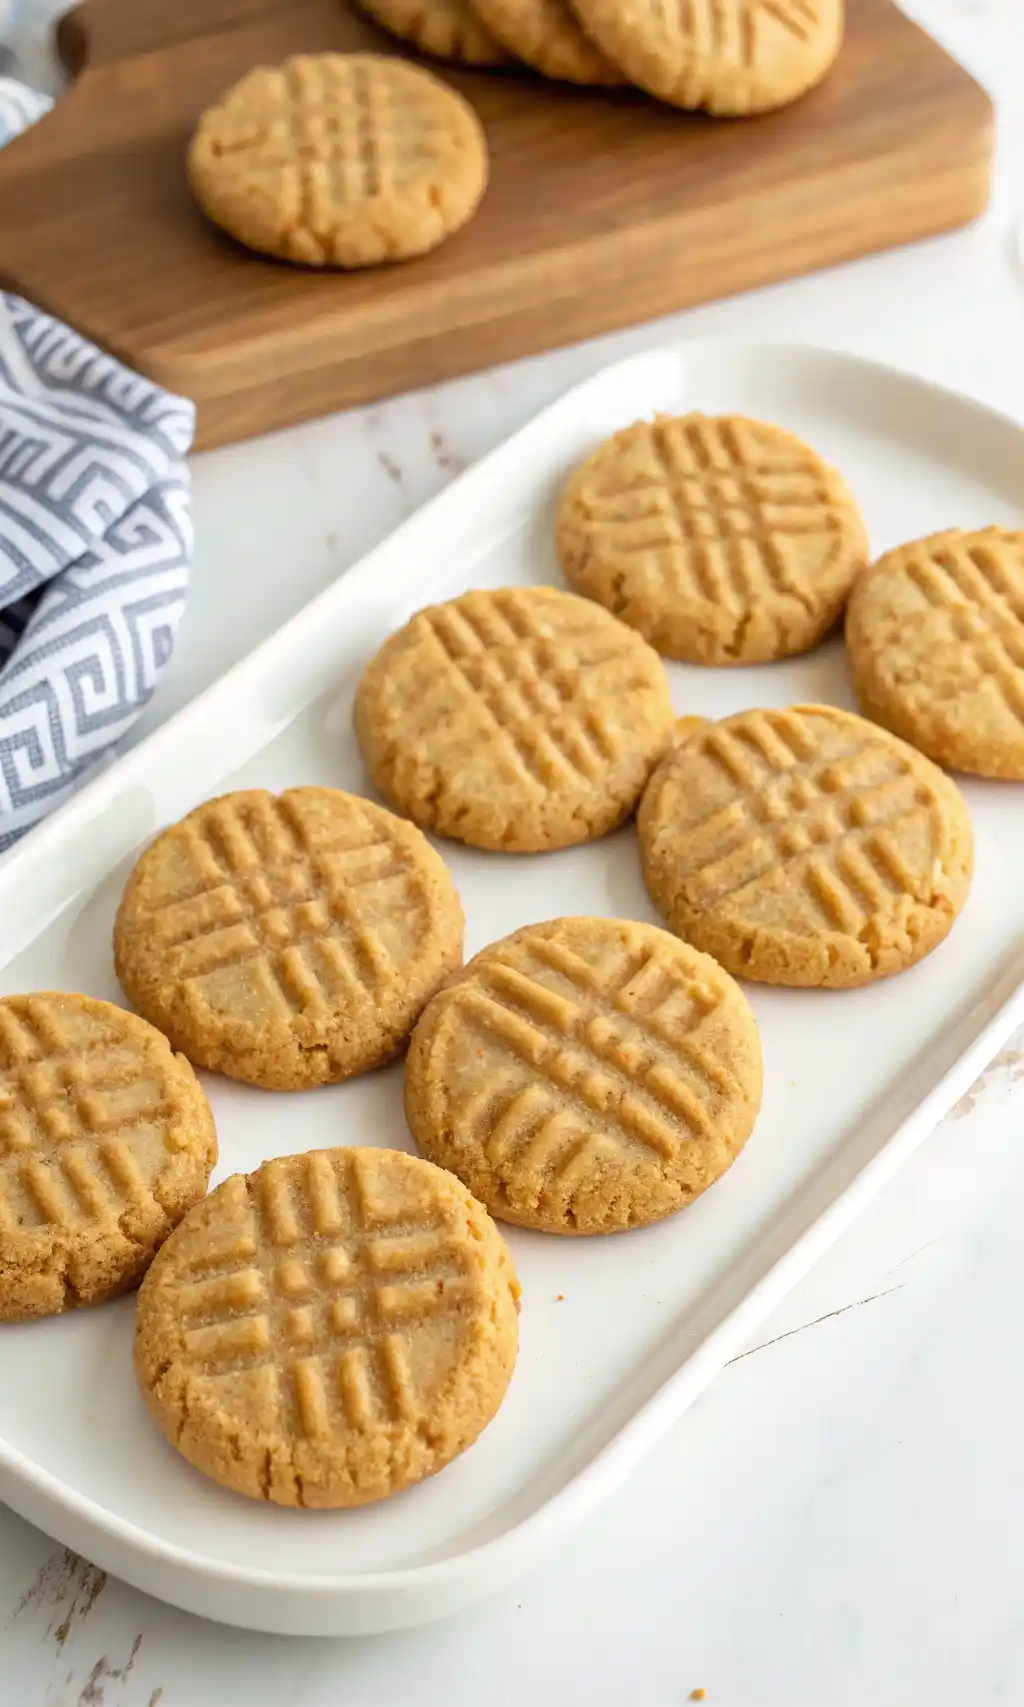
- Shape Those Beauties – Now for the fun part! Roll tablespoon-sized balls of dough and place them on your baking sheets. Use a fork to create that classic crosshatch pattern OR get fancy and shape them into peanuts by pinching the middle slightly!
- Bake To Golden Perfection – Slide them into your preheated oven for 10-12 minutes. You want the edges just turning golden while the centers still look slightly soft—they’ll firm up while cooling!
- Patience, Young Baker – Let these treasures cool on the baking sheet for 5 minutes before transferring to a cooling rack. I know it’s tempting to bite into one immediately, but trust me on this!
- Whip Up That Heavenly Filling – While the cookies cool completely, beat together the filling ingredients until smooth and creamy. Start with 3 tablespoons of milk, adding the fourth only if needed for spreadability.
- The Grand Finale – Spread a generous dollop of filling on the flat side of one cookie, then top with another. Give it a gentle squeeze and watch that luscious filling reach the edges. Pure magic!
My Personal Baking Secrets
- Add 1/2 teaspoon of cinnamon to the cookie dough for a subtle warmth that’ll have people asking “What IS that amazing flavor?”
- Pop your dough in the fridge for 30 minutes before baking if your kitchen is warm—helps maintain those perfect shapes!
- For extra-crispy cookies, press them a bit flatter with your fork
- For softer cookies, make them slightly thicker and bake for the minimum time
Mix It Up!
Want to put your own spin on these beauties? Try:
- Mixing mini chocolate chips into the filling (chocolate + peanut butter = ALWAYS a win)
- Rolling the edges in chopped roasted peanuts for extra crunch and visual appeal
- Drizzling the tops with melted chocolate after assembly
- Adding a tiny sprinkle of flaky sea salt on top for that sweet-salty perfection

Storing Your Treasures
These cookies actually taste BETTER the next day as the flavors meld, but good luck having any left! Store them in an airtight container with parchment between layers. They’ll keep for about 5 days at room temperature—if they last that long!
The first time I made these, my family devoured the entire batch before they were even completely cool. Now I always make a double batch—some for sharing, some for “quality control testing” (aka my midnight snack)!
What do you think? Ready to create some peanut butter magic in your kitchen?
Homemade Nutter Butter Cookies
Ingredients
Equipment
Method
- Preheat oven to 350°F and line baking sheets with parchment paper.
- Cream together butter, peanut butter, granulated sugar, and brown sugar until light and fluffy, about 3 minutes.
- Beat in eggs one at a time, then add vanilla extract. Mix until smooth.
- In a separate bowl, whisk flour, baking powder, baking soda, and salt. Gradually add to wet mixture until dough forms.
- Roll dough into tablespoon-sized balls. Place on baking sheets and press lightly with a fork or shape like peanuts.
- Bake for 10–12 minutes until edges are lightly golden. Let cool 5 minutes on pan, then transfer to wire rack.
- While cookies cool, beat filling ingredients until creamy. Add milk as needed for spreadability.
- Spread filling on flat side of one cookie, top with another, and press gently.


